Welcome to our guide on SiteGround’s Site Tools! SiteGround is a popular web hosting provider that ditched cPanel in favor of its own custom control panel. This control panel is called Site Tools, and it’s packed with features to help you create and manage your website.
In fact, SiteGround’s Site Tools are so powerful and easy to use that you might never want to use cPanel again.
One of the key benefits of SiteGround’s Site Tools is that every website on your hosting account has its own Site Tools dashboard. This means if you have multiple websites, each one is isolated, making them more secure and easier to manage.
In this guide, we’ll walk you through everything Site Tools has to offer.
Let’s get started.
How to log in to Site Tools
This guide presumes you have already logged in to the SiteGround client area. If you haven’t already, you can learn how to log in to the SiteGround client area in our SiteGround Client Area Guide.
SiteGround’s Site Tools are only available once you have created a website. If you haven’t already, you can learn how to install WordPress with SiteGround in our How to Install WordPress with SiteGround Guide.
To access SiteGround’s Site Tools for your website, follow these steps:
- Go to the Websites section of the SiteGround client area.
- Click on the “Site Tools” button next to the website you wish to manage.

SiteGround Site Tools: Dashboard
When you log in to SiteGround’s site tools, the first thing you’ll see is the dashboard.

The main section of the dashboard contains links to several of SiteGround’s most popular features. These include:
- Install & Manage WordPress
- Email Accounts
- File Manager
- Site Scanner
You can modify this “Pinned Tools” list by clicking on the “Edit Pinned Tools” button and selecting from the list of available tools.

Underneath, you’ll find the “Site Information” and “This Month Statistics” sections, which details information about your site, including:
- Disk usage, including disk space and inodes used.
- Your site’s IP address.
- Your site’s name servers.
- A graph showing your site’s unique visitors over the past month.
- A graph showing your site’s page views over the past month.
You will see more statistics about your hosting plan by clicking on the “Hosting Plan Statistics” link and more traffic statistics by clicking “View More” under the graphs.

SiteGround Site Tools: Site (Files & Databases)
The Site section of SiteGround’s Site Tools is where you can manage your website’s files, FTP accounts, and databases.
Let’s look at each of these sections in more detail.
Site: File Manager
The File Manager allows you to manage your website’s files and folders.
If you have ever used cPanel, you’ll be familiar with File Manager. It’s essentially the same thing but with a different look and feel.
You can still, for example, use the File Manager to edit your website’s files using the built-in code editor, change file permissions, upload and download files, and more.
In fact, SiteGround’s File Manager is much easier to use than cPanel’s and is much more responsive.

Further reading:
Site: FTP Accounts
The FTP Accounts section of SiteGround’s Site Tools is where you can manage your website’s FTP accounts.
FTP stands for File Transfer Protocol. It is a standard network protocol commonly used to upload and download files to and from a web server. Some popular FTP clients include FileZilla, Cyberduck, and WinSCP.
Here, you can create new FTP accounts, edit existing FTP accounts, and delete FTP accounts. You will also find details of your FTP login information, including your FTP hostname.

Further reading:
- How to create and manage FTP accounts in SiteGround
- How to connect to your SiteGround FTP account using FileZilla
Site: MySQL Databases
The MySQL Databases section of SiteGround’s Site Tools is where you can manage your website’s MySQL databases.
MySQL is a widely-used and reliable database management system that utilizes SQL (Structured Query Language) for adding, accessing, and managing data. Its efficiency, flexibility, and simplicity make it popular, particularly in open-source PHP applications like WordPress.
The MySQL Databases section is split into four: Databases, Users, Remote Access, and PHPMyAdmin.
Let’s look at these in turn.
Site: MySQL Databases: Databases
As the access to SiteGround’s Site Tools requires that you have already created a website (or at least started a blank website), you may already see a MySQL database listed here if you have installed WordPress. If you choose to create a blank site, you can create a database here.
Next to each database, you can manage user access and user permissions, change the label of the database, import a database dump, or delete the database.

Site: MySQL Databases: Users
The Users section of SiteGround’s Site Tools is where you can manage your website’s MySQL users.
As you already have a MySQL user created for your website, you will see this user listed here. You can manage the user’s permissions, add the user to a new database, assign a label, change the user’s password, or delete the user.
Alternatively, you can create a new MySQL user by clicking the “Create User” button.

Site: MySQL Databases: Remote Access
The Remote section of SiteGround’s Site Tools is where you can configure remote access to your MySQL databases.
You will need to follow your applications’ documentation to configure remote access to your MySQL databases.

Site: MySQL Databases: PHPMyAdmin
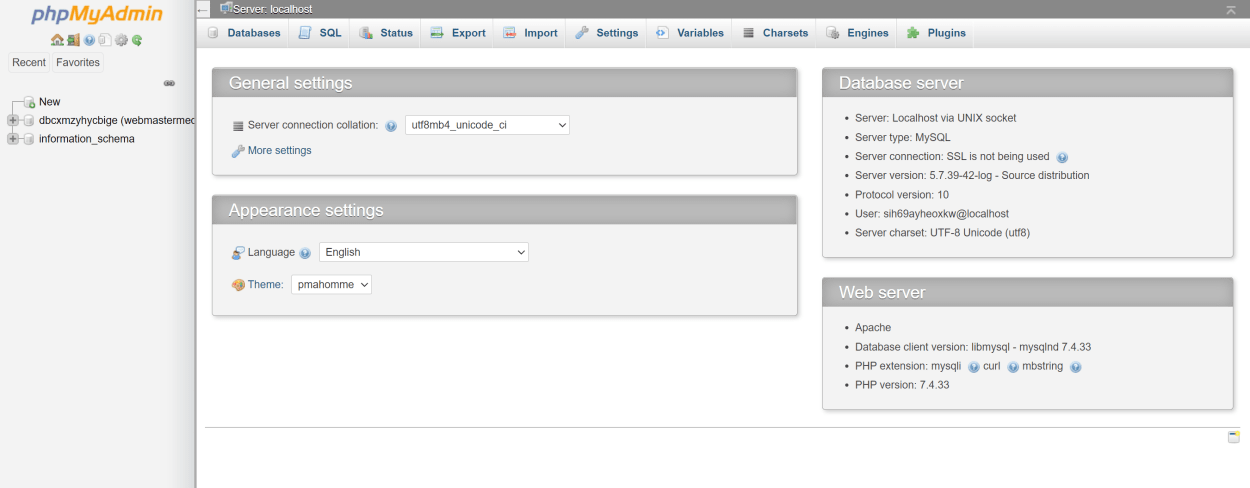
The PHPMyAdmin section is where you can access your MySQL databases using PHPMyAdmin.
If you have ever used Plesk or cPanel, you will already be familiar with PHPMyAdmin. It is a free and open-source web-based tool written in PHP that provides a graphical user interface for managing and interacting with MySQL databases.
It allows users to perform tasks such as creating, modifying, and deleting databases and tables, managing users and permissions, executing SQL queries, and much more.
To access PHPMyAdmin, click on the “ACCESS PHPMYADMIN” button.

You will then be taken to the familiar interface.
Further Reading:
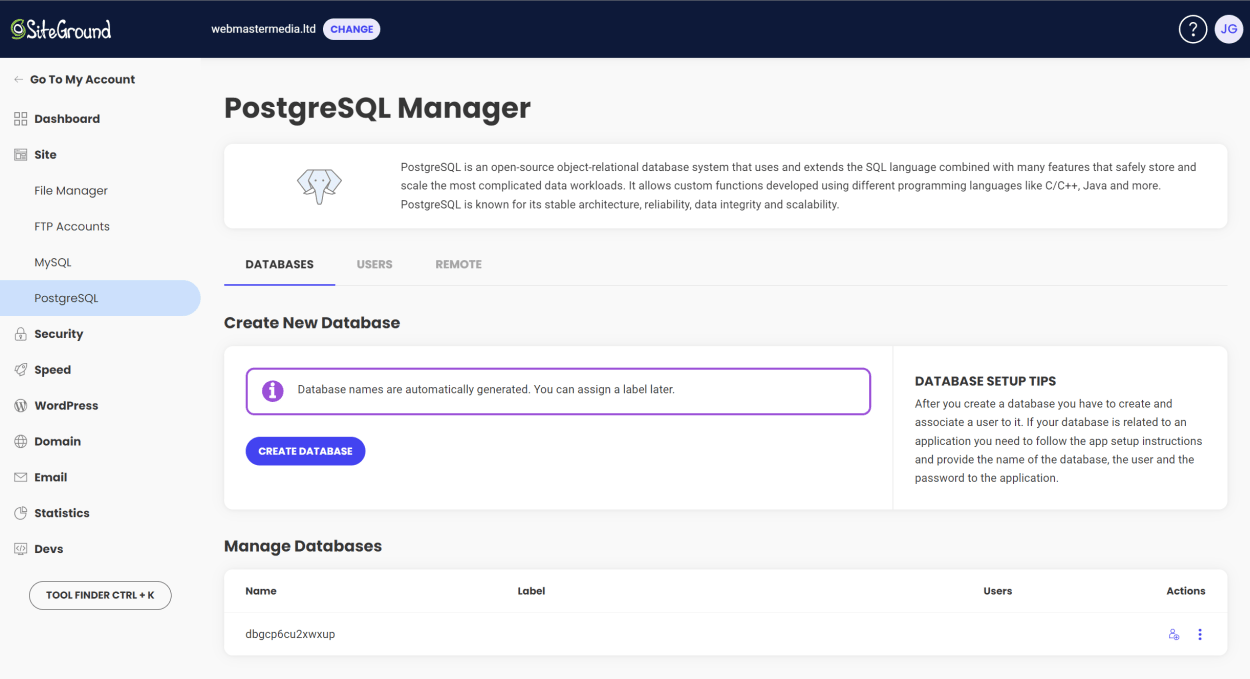
Site: PostgreSQL Databases
The PostgreSQL Databases section is where you can manage your website’s PostgreSQL databases.
Unlike MySQL, PostgreSQL is an object-relational database management system that uses and extends the SQL language combined with many features that safely store and scale the most complicated data workloads.
Like the MySQL Databases section, the PostgreSQL Databases section is split into sections: Databases, Users, and Remote Access. Unfortunately, there is no PHPMyAdmin equivalent for PostgreSQL, and you will need to use a third-party tool such as pgAdmin.
Let’s look at these in turn.
Site: PostgreSQL Databases: Databases
WordPress does not use PostgreSQL databases, so you most likely created a blank site for this website in Site Tools.
You can create a database with a single click, assign a user, and you are ready to go.
Next to each database, you can manage user access, user permissions, change the label of the database, import a database dump, or delete the database.
Site: PostgreSQL Databases: Users
The Users section of the PostgreSQL Manager is where you can manage your website’s PostgreSQL users.
You can easily create a user, manage the user’s permissions, add the user to a new database, assign a label, change the user’s password, or delete the user.

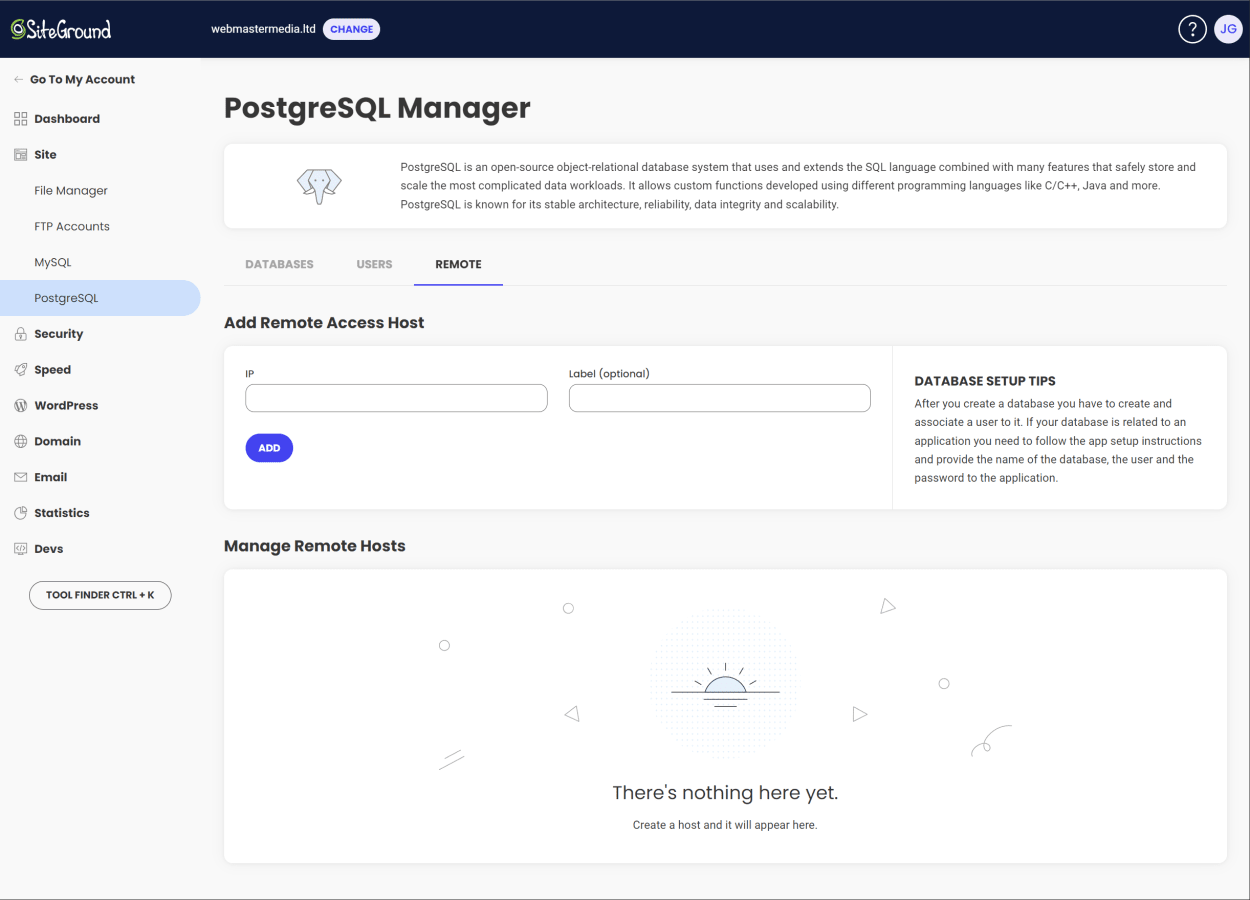
Site: PostgreSQL Databases: Remote Access
The Remote section of SiteGround’s Site Tools is where you can configure remote access to your PostgreSQL databases.
You will need to follow your applications’ documentation to configure remote access to your PostgreSQL databases.
SiteGround Site Tools: Security
The Security section of SiteGround’s Site Tools is where you can manage your website’s security, including Backups, SSL, HTTPS, Protected URLs, IP Blocker (Blocked Traffic), and Site Scanner.
Let’s look at each of these in turn.
Security: Backups
SiteGround has one of the cleanest and most intuitive backup interfaces around. It is easy to use and simple, but most importantly, it works really well.
Here are the most important things you need to know about your SiteGround backups:
- SiteGround provides daily backups, which are kept for 30 days on shared hosting plans, and 7 days on cloud hosting plans.
- You can restore your website from a backup with a single click.
- You can restore files, databases, and emails.
- You can make up to 5 manual on-demand backups. These are stored for 30 days on shared hosting plans and 7 days on cloud hosting plans.
This section contains two pages; Create & Restore and Restore History.
Let’s look at these in turn.
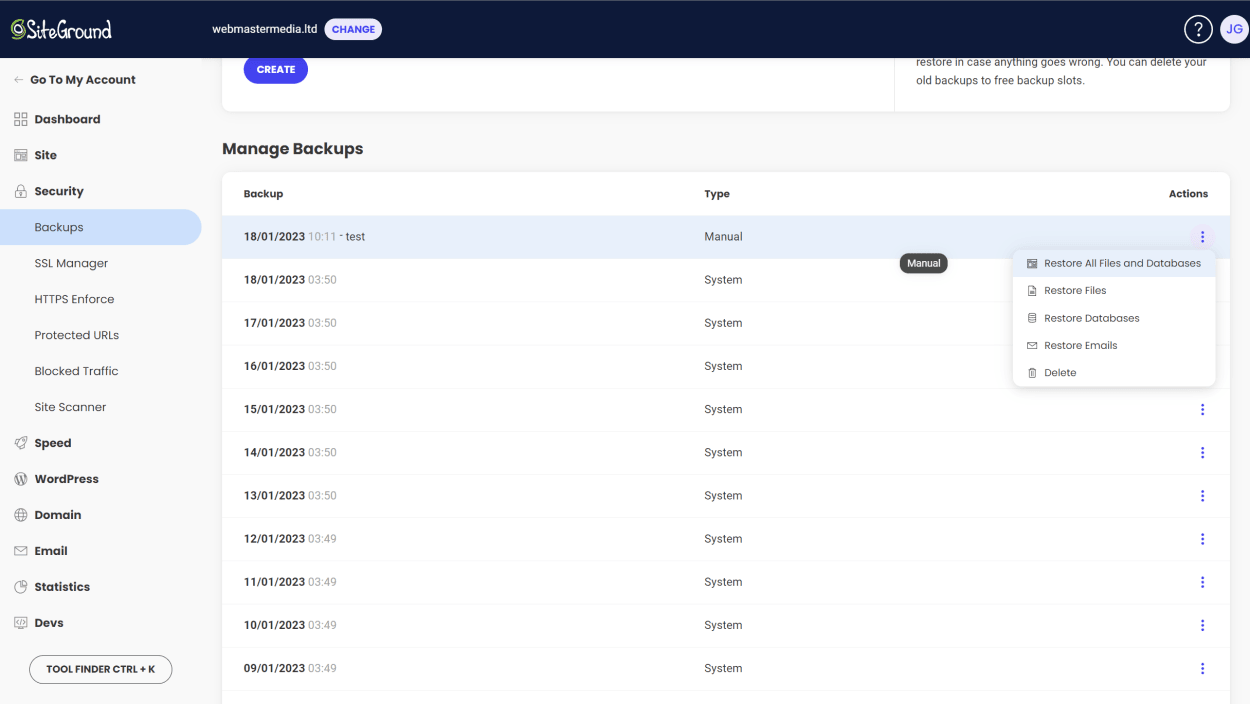
Security: Backups: Create & Restore
The Create & Restore section of SiteGround’s Site Tools is where you can create and restore backups.
To create a manual backup in one of your five backup slots, type in a name for your backup and click on the “CREATE” button. As mentioned above, these are kept for 30 days on shared hosting plans and 7 days on cloud hosting plans.

To restore a backup, click on the three dots in the Actions column next to your chosen backup. You will then be presented with a list of options.
- Restore files, databases, and emails
- Restore files
- Restore databases
- Restore emails
- Delete backup will show for manual backups only.
Just click on your chosen option to start the process, and the restoration process will begin.
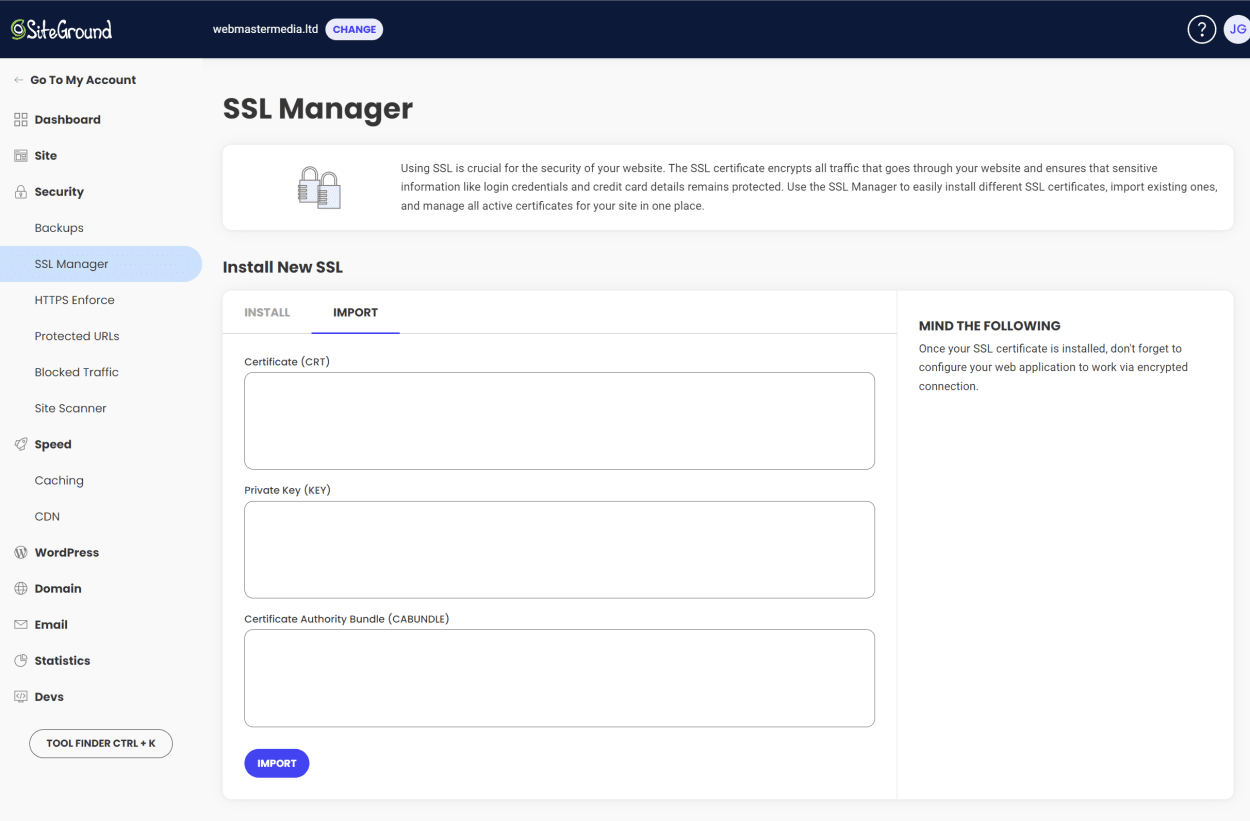
Security: SSL Manager
The SSL Manager section of SiteGround’s Site Tools is where you can manage your website’s SSL certificates.
You can install a free Let’s Encrypt SSL certificate (including Wildcard) with a single click or, alternatively, order a Premium Wildcard SSL Certificate.
This is also the place to manage your existing SSL certificates.

You can also import your own SSL certificate.
Security: HTTPS Enforce
After installing an SSL certificate, you will need to enforce HTTPS on your website. This is done in the HTTPS Enforce section of SiteGround’s Site Tools.
To activate, click on the HTTPS Enforce toggle switch.

Security: Protected URLs
The Protected URLs section of SiteGround’s Site Tools is where you can restrict access to specific URLs on your website to particular users.
Here are the most important things you need to know:
- You can protect any URL on your website, even if it does not exist on the server.
- You must set a username and password to gain access.
- You can give access to your protected URLs to different users.
Configuring a protected URL is easy. Just add the path you wish to protect and the username and password you want to use to gain access.
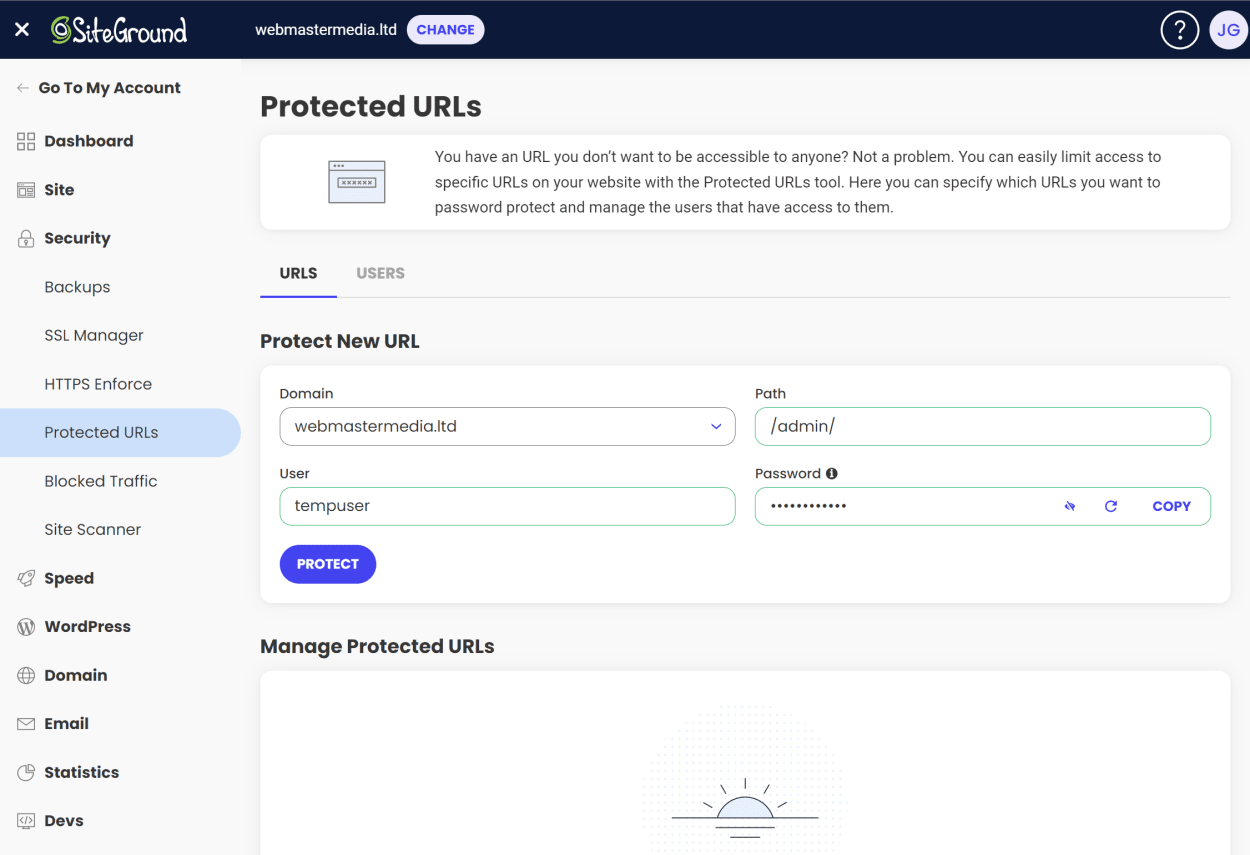
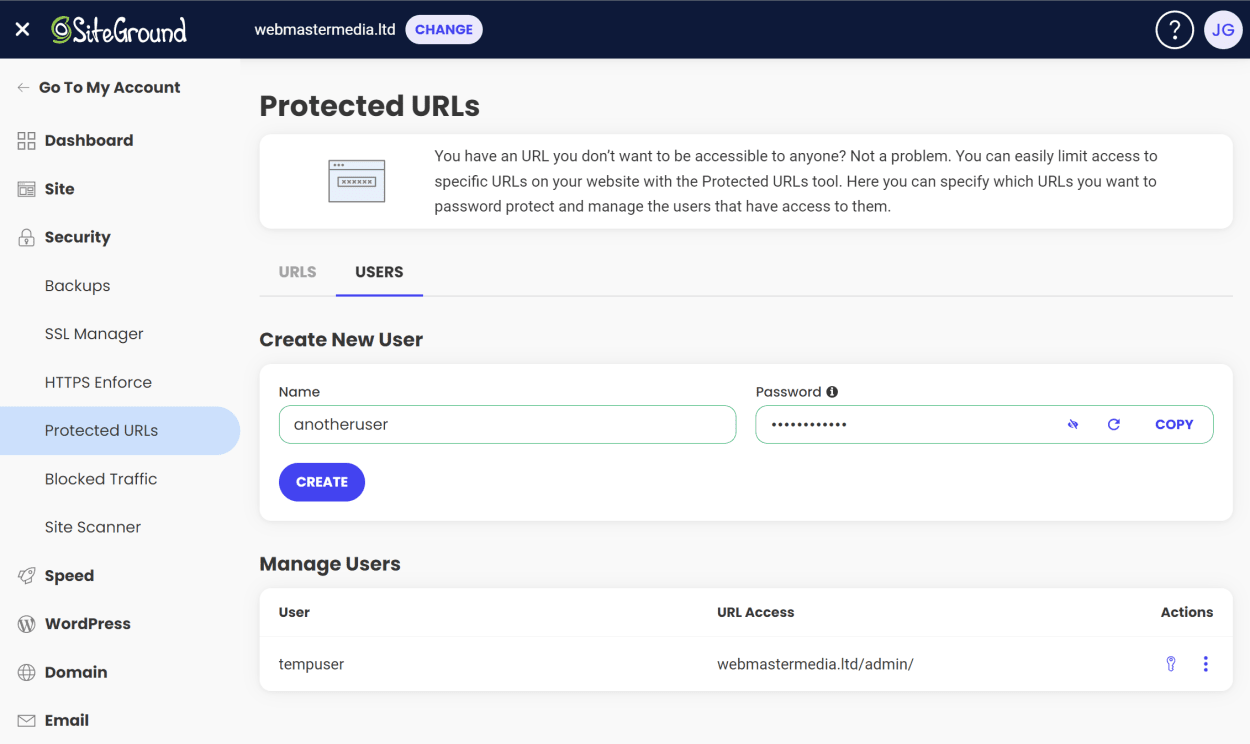
Once you have created your first protected URL, the user will be saved and automatically used for further protected URLs. You can select different users from the drop-down menu or create new users via the “Users” tab.
You can assign multiple users to the same protected URL.
Security: Blocked Traffic
The Blocked Traffic section of SiteGround’s Site Tools is where you can block IPs, IP ranges, or entire countries from accessing your website.
This can be beneficial if you notice suspicious activity coming from a particular IP address or country.
For instance, you may have a local business website and notice that a lot of bandwidth is being used by a particular country in which you do not do business. You can save resources by blocking that country.
Security: Blocked Traffic: Block IP \ IP Range
To block an IP or IP range, select your domain and then enter the IP or IP range in the text box. Then click on the “Block” button.
IP addresses can be entered in the following formats:
- Single IP address (e.g., 192.168.1.1)
- IP address range (e.g., 192.168.1.1-192.168.1.100)
- CIDR notation (e.g., 192.168.1.0/24)

Security: Blocked Traffic: Block Country
To block a country, select your domain, and then select the country in the drop-down menu. Then click on the “Block” button.

Security: Site Scanner
The Site Scanner section of SiteGround’s Site Tools is where you can scan your website for malware.
Below is a brief guide to the Site Scanner features and a tour of the interface. You can also see our detailed guide to SiteGround’s Site Scanner here.
Here is how the interface looks:
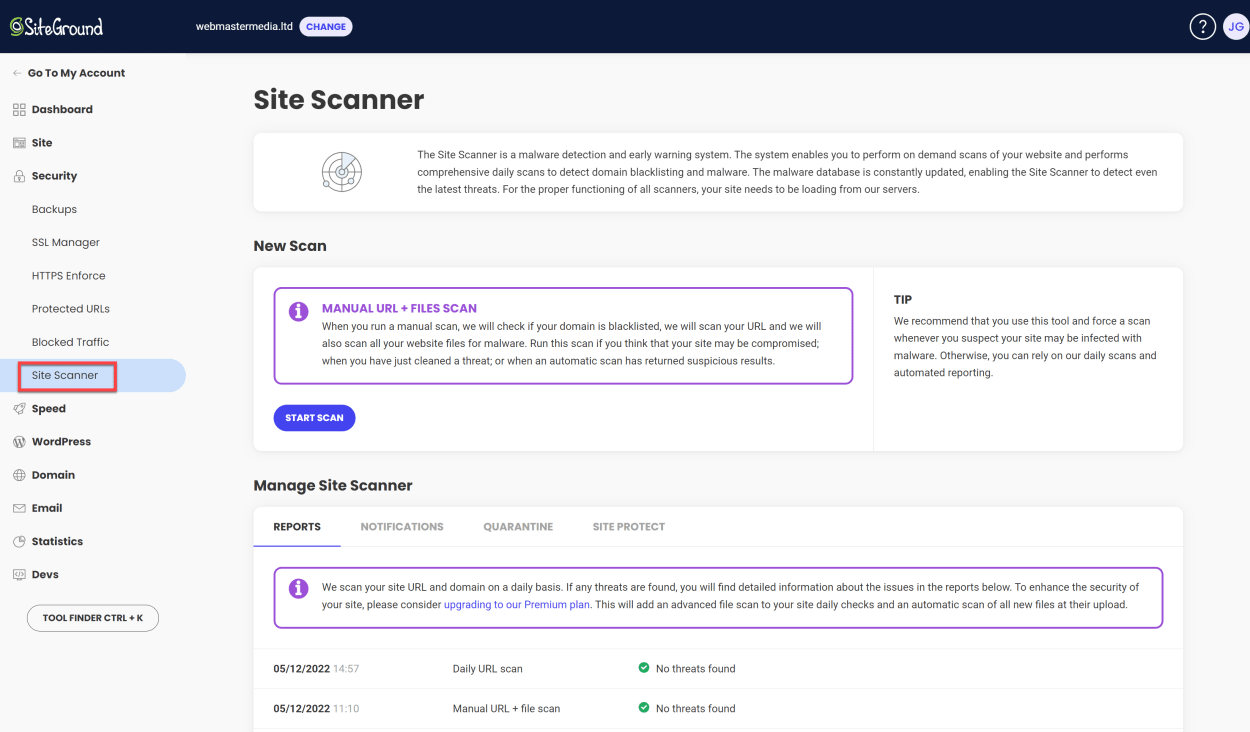
The Site Scanner Basic features include:
- URLs scan - The URLs scan checks pages on your website for malicious behavior and infections.
- Domain blacklist scan - SiteGround checks whether your domain has been blacklisted in the search engines due to hacks or suspicious behavior. The blacklist checks information from Google, Yandex, Chrome, Firefox, Norton, McAfee, and more.
- Site Protect Mode - If you get a malware notification or suspect your website may be compromised, you can enable Site Protect Mode. This allows you to disable all file uploads to your website and disable the execution of PHP shell commands until you can ensure the website is no longer infected.
- Email threat notifications - SiteGround sends immediate notifications if they detect anything suspicious with your site.
- Email weekly reports - SiteGround sends a weekly email about your site’s status.
- On-demand manual scan - You can manually scan your entire website (domain, links, and files) at any time through your Site Scanner interface. Run a scan if you have any concerns that your website may be compromised or after a cleanup to ensure that your website is malware-free.
- 30 days scan history - You can find a 30-day history of your site scans in your Site Scanner interface with the scan results and detailed information about threats and malware.
The Site Scanner Premium features include:
- Comprehensive Files scan - This is SiteGround’s most comprehensive malware check. It will check every single file hosted on your account. It will check for malware, suspicious code, and other irregularities.
- File upload scan - With file upload scan SiteGround will check every new file uploaded to your site - whether it’s through File Manager, FTP, or your WordPress backend. This is one of SiteGround’s best prevention tools that can detect malware as soon as it appears and will notify you immediately.
- File upload quarantine - If a threat is detected during a new file upload, SiteGround will immediately quarantine the affected file.
Let’s look at the different sections of the Site Scanner interface.
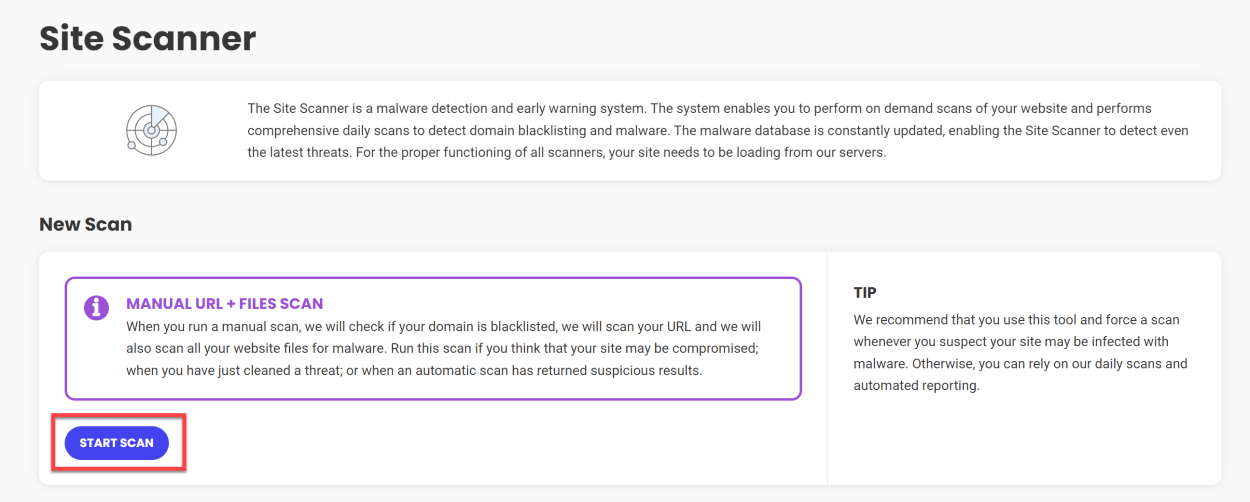
Manual URL + Files Scan
All Basic and Premium users can start an instant manual scan. To do this, click “Start Scan”.
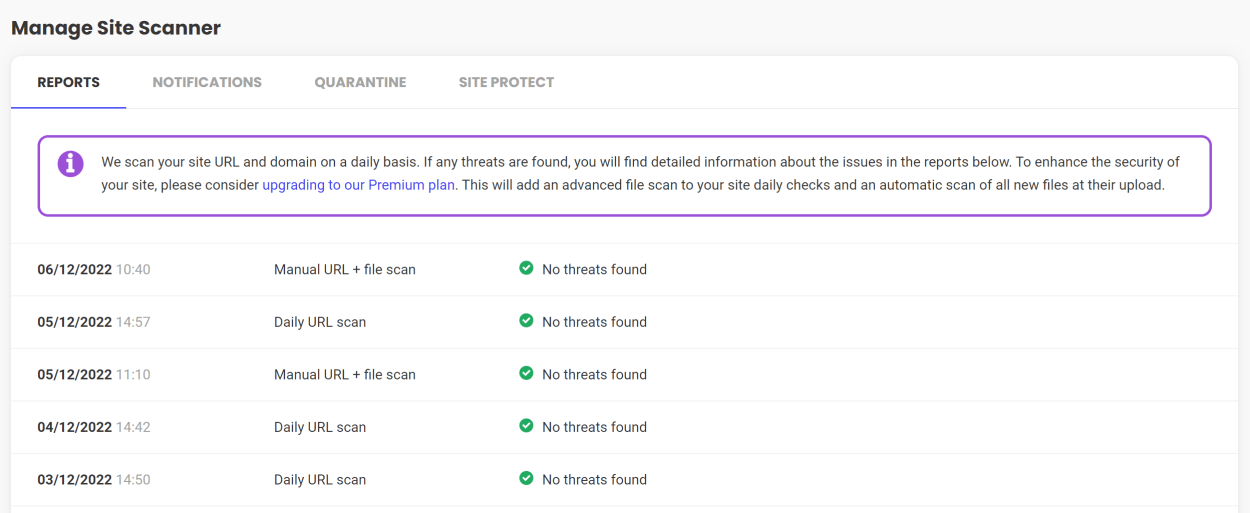
Site Scanner Scan History
At the bottom of the SG Scanner interface, you will access details of any scans for the last 30 days.
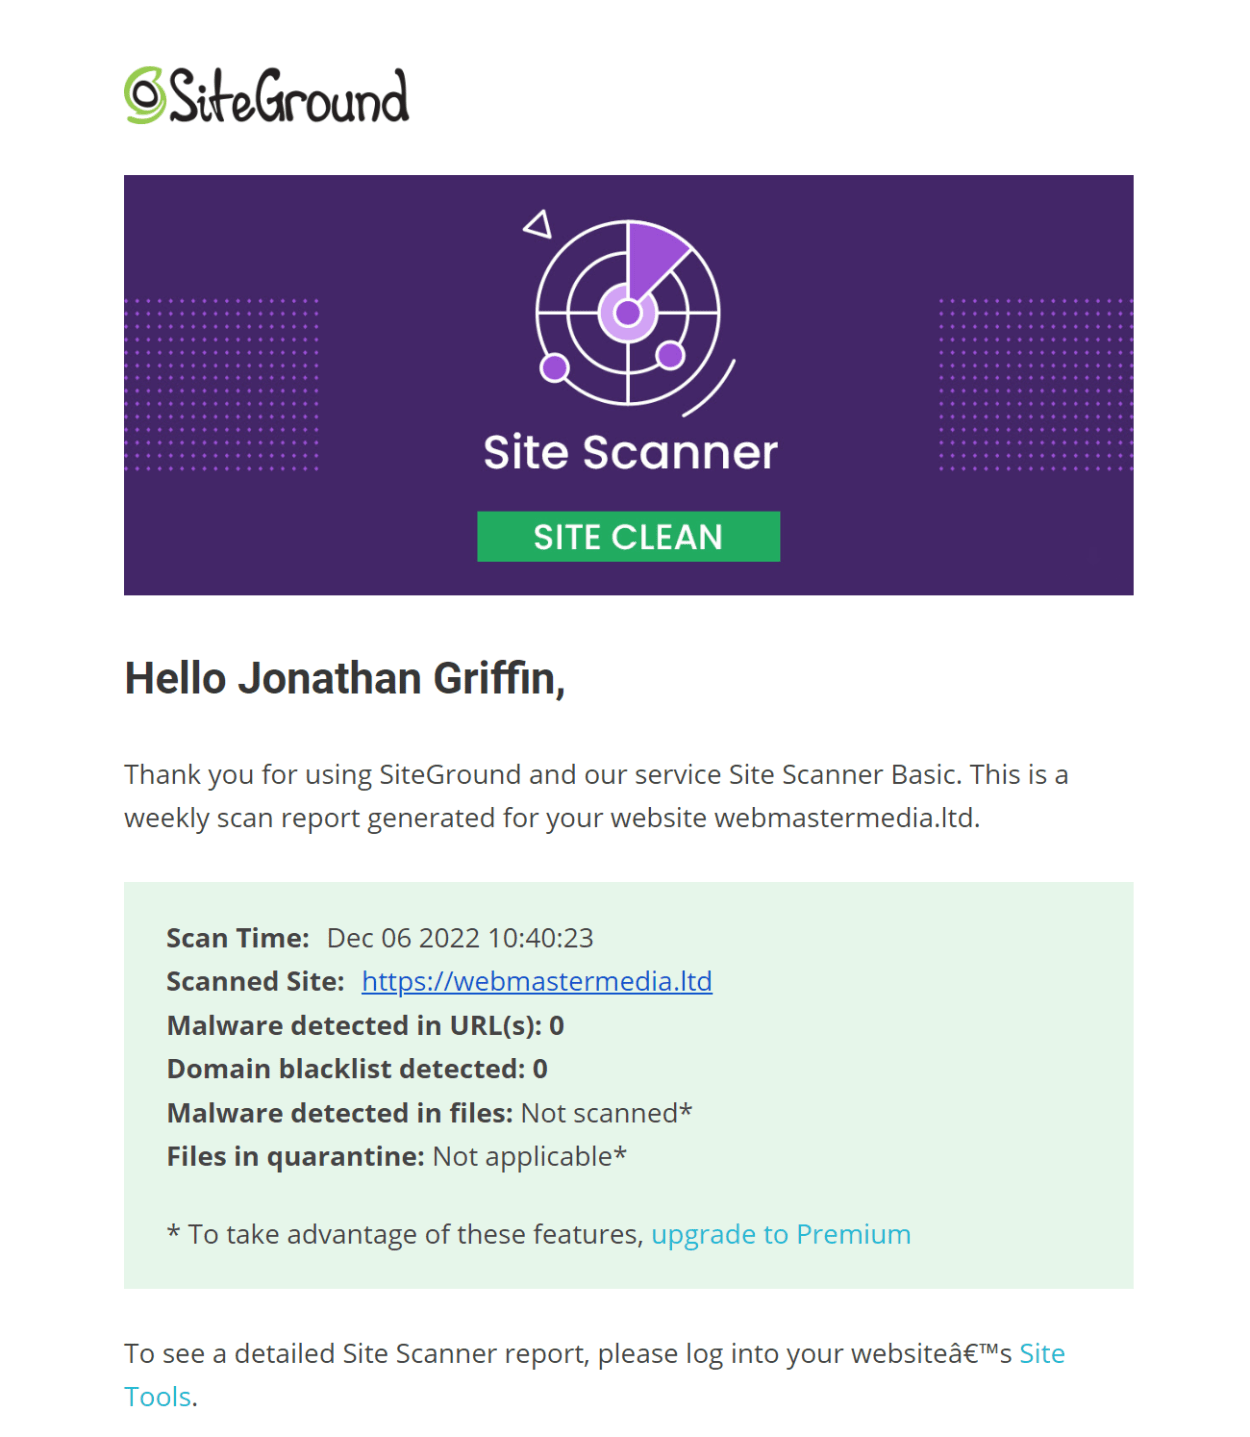
Weekly Report
You have the option to turn on weekly email notifications. You can see an example email report below:
Quarantine
If you have SG Site Scanner Premium, you can configure it to automatically move any malicious files to a separate folder outside your document root.
You can review any quarantined files and choose to either restore or delete them.

Site Protect
Site Protect is a reasonably new addition to the SG Site Scanner. It is intended to be used when you believe your site to be compromised.
It allows you to lock down your site while you assess the situation and includes the following features:
- Disable FTP
- Disable SSH
- Disable PHP Upload
- Disable execution of shell commands via PHP
Enabling these options will stop any malicious actor from carrying out any further damage to your website.
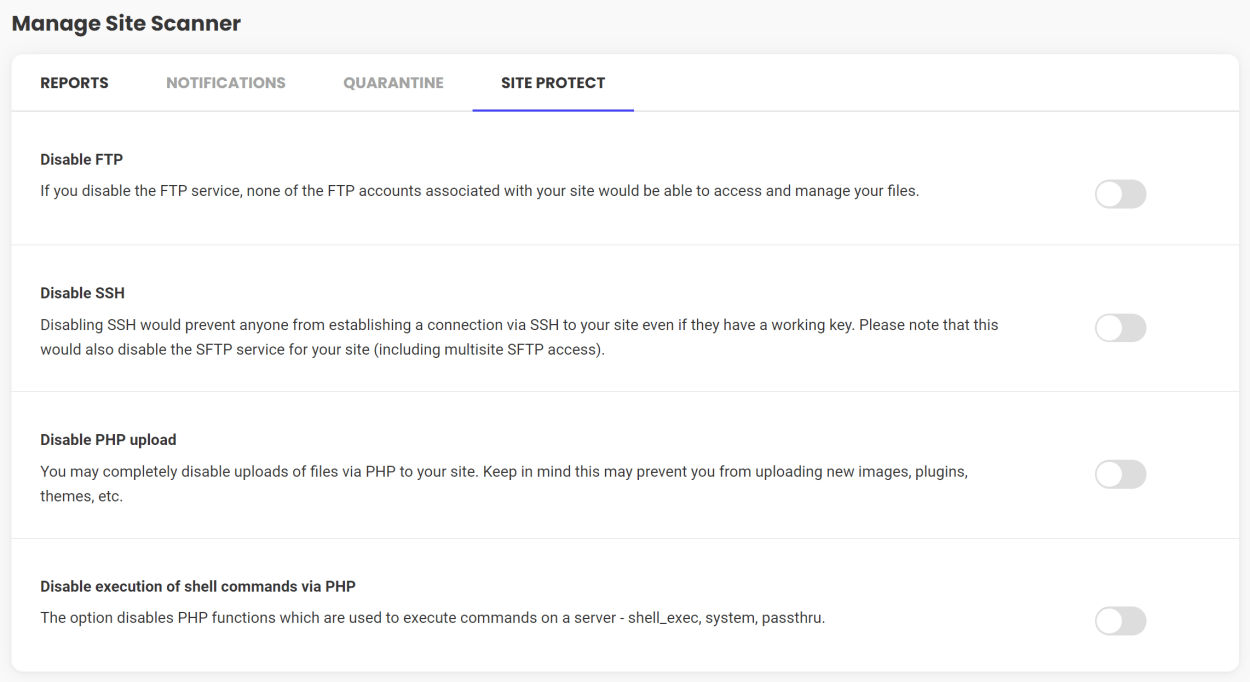
Once you have removed any malicious files and are sure your website is safe, you can disable the Site Protect options.
SiteGround Site Tools: Speed
The Speed section of SiteGround’s Site Tools is where you can enable Caching and CDN services for your website.
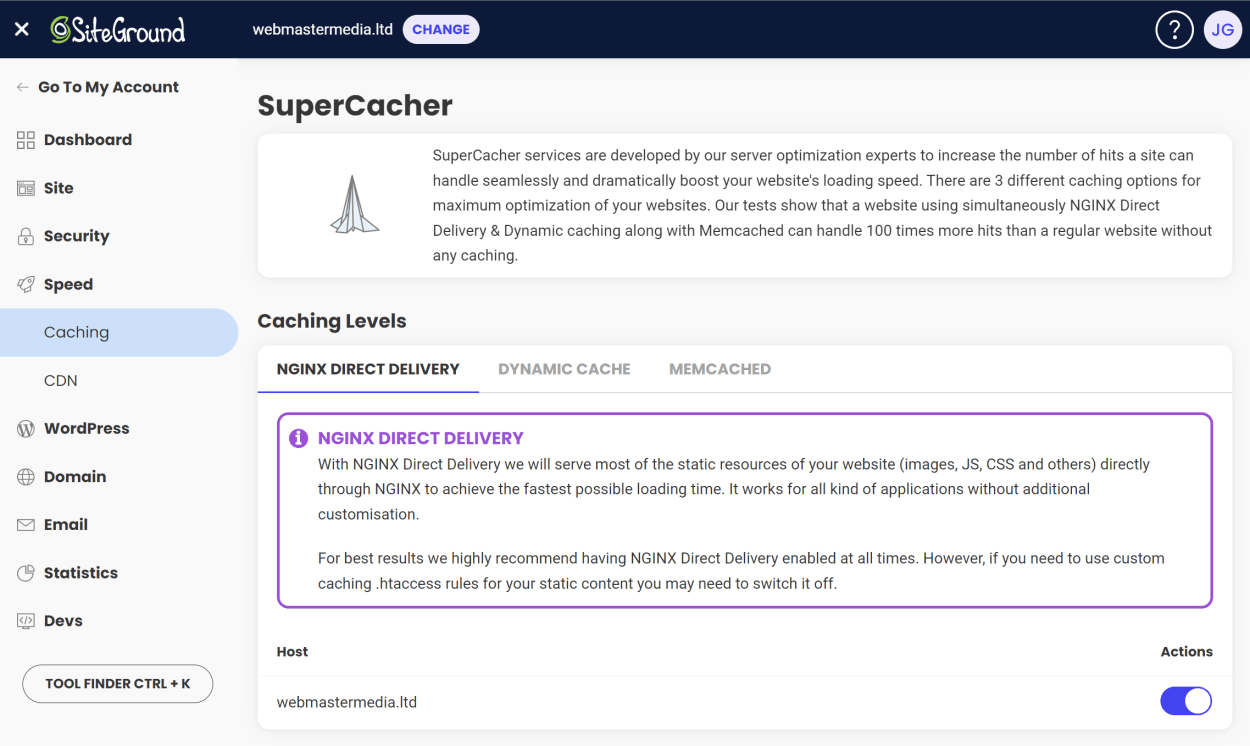
Speed: SuperCacher Caching
SiteGround provides a caching service called “SuperCacher” for your website and is available on all plans.
It includes:
- NGINX Direct Delivery
- Dynamic Caching
- Full Page Caching
Let’s look at each of these in more detail.
SuperCacher Caching: NGINX Direct Delivery
NGINX Direct Delivery directly serves most static resources (e.g., images, JS, CSS) through NGINX to achieve the fastest possible loading time. It works for all kinds of applications without additional customization.
To turn on NGINX Direct Delivery, click the toggle switch.
SuperCacher Caching: Dynamic Caching
The Dynamic Cache is a caching mechanism that stores the entire content of a webpage, including both static and non-static resources. Doing so reduces the number of database queries and the processing required for each page visit, thus significantly improving your website’s loading speed and TTFB (time to first byte). It is most effective when used in conjunction with SiteGround’s Optimizer Plugin for WordPress.
The Dynamic Cache is enabled by default. You can disable it through the SiteGround Optimizer Plugin. Alternatively, for a non-WordPress site, you can disable it via the .htaccess file.

SuperCacher Caching: Memcached
Memcached is an object caching mechanism designed to improve the connection between your application and its database. It dramatically improves the loading speed of dynamic content that can’t be served by Dynamic Caching (checkout pages, dashboards, backends, etc.).
To enable Memcached, click the toggle switch. You can also flush the cache by clicking on the brush icon.

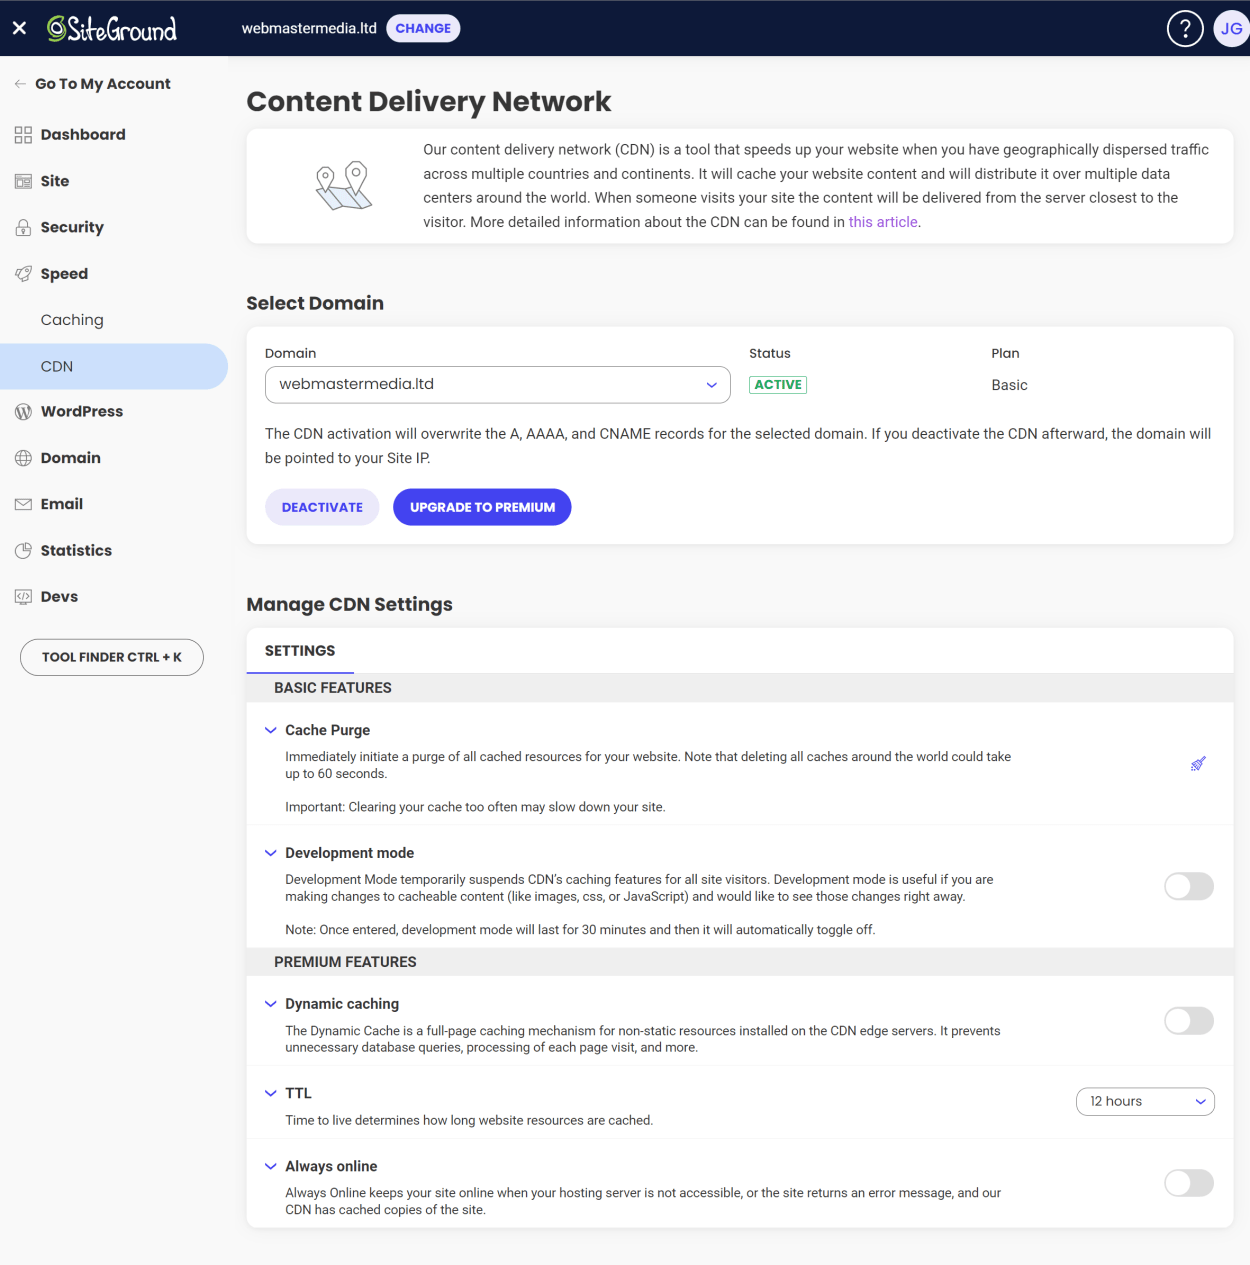
Speed: CDN
The CDN section of SiteGround’s Site Tools is where you can set up a Content Delivery Network for your website.
A CDN can significantly speed up your website by caching your content on servers around the world. When a visitor requests a page, the content is served from the server closest to them.
SiteGround’s CDN currently has 16 CDN locations around the world.

There are two CDN options available:
- Free - This will cache your static content (e.g., images, CSS, JS) and is available on all plans.
- Premium - This will cache your static and dynamic content. In other words, the entire web page is cached globally. This significantly speeds up your website and is worthwhile for websites with a lot of global traffic. It also includes “Always Online” functionality, which will display a cached version of your website if your server is down (if available).
SiteGround Site Tools: WordPress
The WordPress section of SiteGround’s Site Tools is where you can manage your WordPress website, including:
- Installing and managing WordPress
- Creating a staging environment
- Migrating your website
- Configuring WordPress and Plugins automatic updates
- Searching and replacing strings in your database.
Let’s look at each of these in more detail.
WordPress: Install & Manage
The Install & Manage section of SiteGround’s Site Tools is where you can install and manage your WordPress installations.

Here you can install WordPress or a WordPress + WooCommerce installation. During the installation process, you can choose to install SiteGround’s WordPress Starter Plugin, which will help guide you through setting up your website.
See our in-depth guide on how to install WordPress on SiteGround.
At the bottom of the page, you will see any existing WordPress installations on your account. You can manage these installations by clicking on the links in the “Actions” column, including:
- Log into the WordPress admin area with a single click.
- Update the Admin Password.
- Reset file and folder permissions.
- Disable all WordPress plugins.
- Move the WordPress installation to a different folder.
- Delete the WordPress installation.

WordPress: Staging
The Staging section of SiteGround’s Site Tools is where you can create a staging environment for your WordPress website.
Using a staging copy of a website allows for testing and making changes before they are made live on the production site. This can help minimize the risk of breaking the live site and ensure that changes are working as intended before making them public.
With SiteGround, you can create a staging environment by entering a name and clicking the “Create” button. This will create a copy of your website, which you can access by clicking on the “Staging Copy” link.
When you are ready to make the staging copy live, you can do a full or partial deployment (custom deployment). Alternatively, you can replicate or destroy the staging copy.

WordPress: Migrator
The Migrator section of SiteGround’s Site Tools is where you can migrate your WordPress website to SiteGround.
The process involves downloading a migration plugin, which you can then use to migrate your website to SiteGround. The plugin works exclusively with SiteGround, and won’t work with other hosting providers.
To use the migration plugin, you must use SiteGround’s WordPress Migrator tool to generate a token. This token is then used to authenticate the migration plugin.
Simply add the token to the migration plugin and follow the on-screen instructions to migrate your website.

WordPress: Autoupdate
The WordPress auto-update settings allow you to configure automatic updates for WordPress and your installed plugins.
You can choose to enable automatic updates for:
- Major releases (e.g., 5.0 to 5.1)
- Minor releases (e.g., 5.1 to 5.1.1)
- Plugins
You can choose the update frequency of major and minor releases should you wish to change from the defaults.

At the bottom of the page, you will see a link to see the auto-update status of all your WordPress installations. This launches a modal window with all the details, as you can see below.

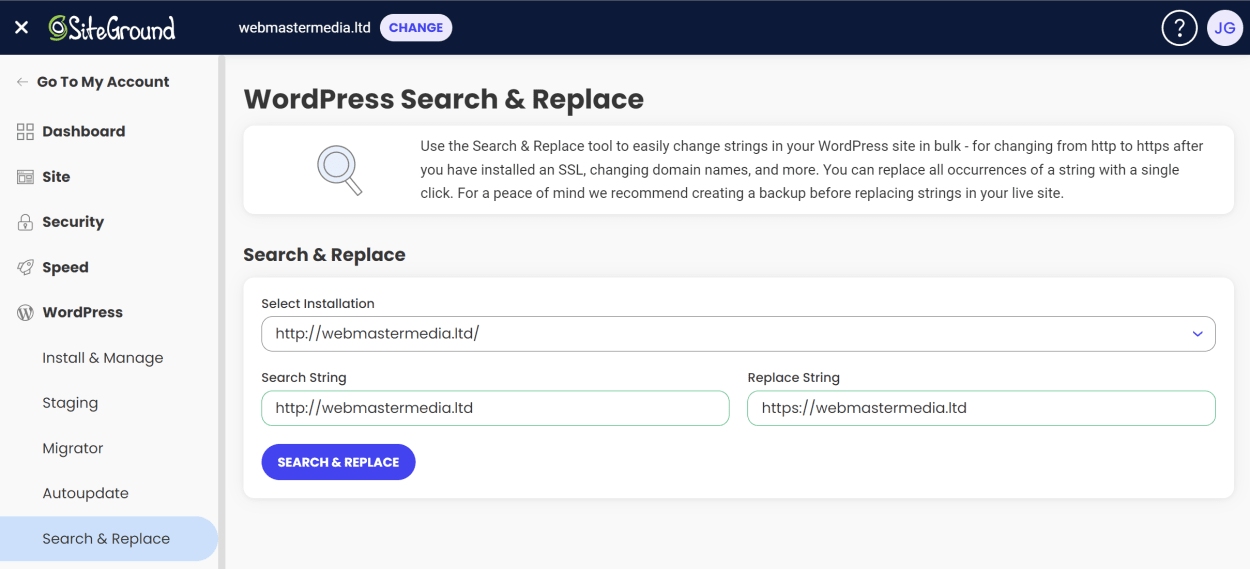
WordPress: Search & Replace
The Search & Replace tool is valuable for making bulk changes to strings in your WordPress site. It can be used to change URLs from http to https after installing an SSL, change domain names, and more. It allows you to replace all occurrences of a string with a single click.
The tool does not allow you to preview all the changes that will be made. It simply makes the changes and then displays a success message. There is also no ability to undo changes. It’s, therefore, essential to ensure you have a backup before using it.
To use the Search & Replace tool, enter the string you wish to replace and the string you want to replace it with. Then click the “Replace” button.
SiteGround Site Tools: Domain
The Domain section of SiteGround’s Site Tools is where you can manage your website’s domains, including:
- Adding new parked domains
- Adding new subdomains
- Adding new redirects
- Managing DNS records
Let’s take a look at each of these in turn.
Domain: Parked Domains
Parked domains are additional domain names that can point to your main website.
Parked domains can be used in situations where you want to have different variations of your domain name lead to the same website or to ensure that visitors who mistype your primary domain name will still be able to reach your site.
For a parked domain to work, you must ensure one of the following is true:
- Your primary domain name is hosted on SiteGround.
- Your DNS records for your parked domain point to your SiteGround hosting account.
To add a parked domain to your site, enter the domain name you wish to park and click the “Add” button.

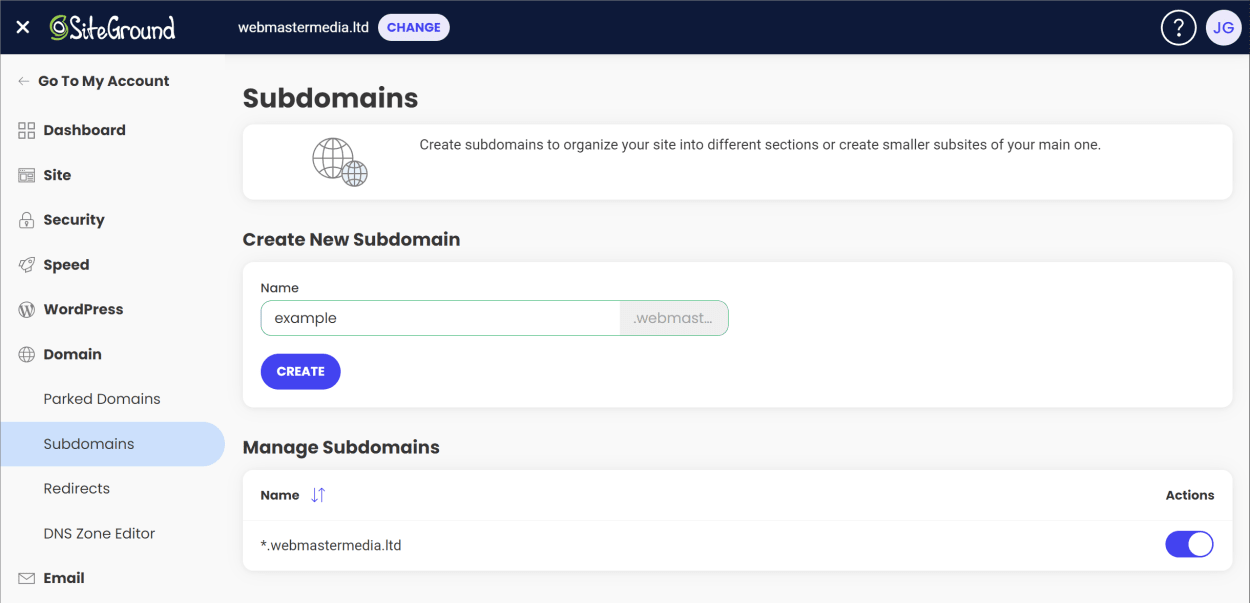
Domain: Subdomains
The Subdomains section in SiteGround’s Site Tools allows you to add or manage subdomains associated with your website. A subdomain is a domain that is part of a larger domain. It is created by adding a prefix, such as “blog,” to the main domain name.
For example, “blog.example.com” would be a subdomain of the main domain “example.com”.
To create a subdomain, enter the subdomain name you wish to add and click the “Create” button.
Once you have installed a subdomain, you will be prompted to install an application or return to the default subdomain dashboard.

If you decide not to install an application at this time, you will see a default page upon visiting the subdomain, as shown below.

With SiteGround, you can also configure wildcard subdomains for your website.
By default, SiteGround will add a wildcard subdomain for your main domain name in the configuration settings. However, you may need to toggle it to the on position.
You can see the format of how to configure a wildcard subdomain in the image below.

Wildcard subdomains allow you to redirect all visitors to your website regardless of what subdomain they use to access it. This can be useful in cases where visitors may accidentally type in the wrong subdomain or if you want to direct all traffic to a specific location.
When you create a wildcard subdomain, it acts as a catch-all for any subdomain that does not have a specific rule set up. For example, if you have a wildcard subdomain set up for “*.example.com”, any request for “sub1.example.com” or “sub2.example.com” will redirect to the same location.
Additionally, you can use wildcard subdomains to catch mistyped subdomains; for example, if someone types “ww.yourdomain.com” instead of “www.yourdomain.com,” it would still redirect to the correct location.
Domain: Redirects
The Redirects section of SiteGround’s Site Tools is where you can configure one URL to redirect to another.
To add a redirect, enter the URL you wish to redirect and the URL to which you want to redirect it. You can choose between a 301 or 302 redirect. Then click the “Create” button.
You can see an example of how to add a redirect in the image below.

Unfortunately, SiteGround Tools does not allow you to add a wildcard redirect. However, this can be achieved by modifying your .htaccess file.
Domain: DNS Zone Editor
The DNS Zone Editor section of SiteGround’s Site Tools allows you to manage various types of DNS records, including:
- A records, which map a domain name to an IP address.
- AAAA records, which map a domain name to an IPv6 address.
- CNAME records, which map a subdomain to another domain name.
- MX records, which specify the mail servers for a domain.
- SRV records, which specify the location of a service on the network.
- TXT records, which can store arbitrary text data associated with a domain name.
A couple of points to note:
- To use the SiteGround Tools DNS Zone editor, you must either have your domain registered with SiteGround or have your domain’s DNS records pointing to SiteGround.
- If you have SiteGround’s CDN service activated, it will manage your A and AAAA records. This means you cannot edit these records in the SiteGround Tools DNS Zone editor unless you disable it.
To add a DNS record, select the type of record you wish to add and enter the required information. Then click the “Create” button.

SiteGround Site Tools: Email
The Email section of SiteGround’s Site Tools is where you can manage your website’s email.
Email: Email Accounts
The Accounts section of SiteGround’s Site Tools is where you can manage your website’s email accounts.

Once you have created an email, you will see it listed under the “Manage Email Accounts” section at the bottom of the page.
Here you can see your current usage and quota, as well as manage the email address via the actions button, including:
- Log in to webmail.
- Change password.
- Change quota.
- View Mail configuration.
- Delete the email address.

Email Accounts: Access Webmail
After creating an email account, you can access the webmail interface by clicking the “Log in to webmail” button in the Manage Email Accounts section under the Actions column.
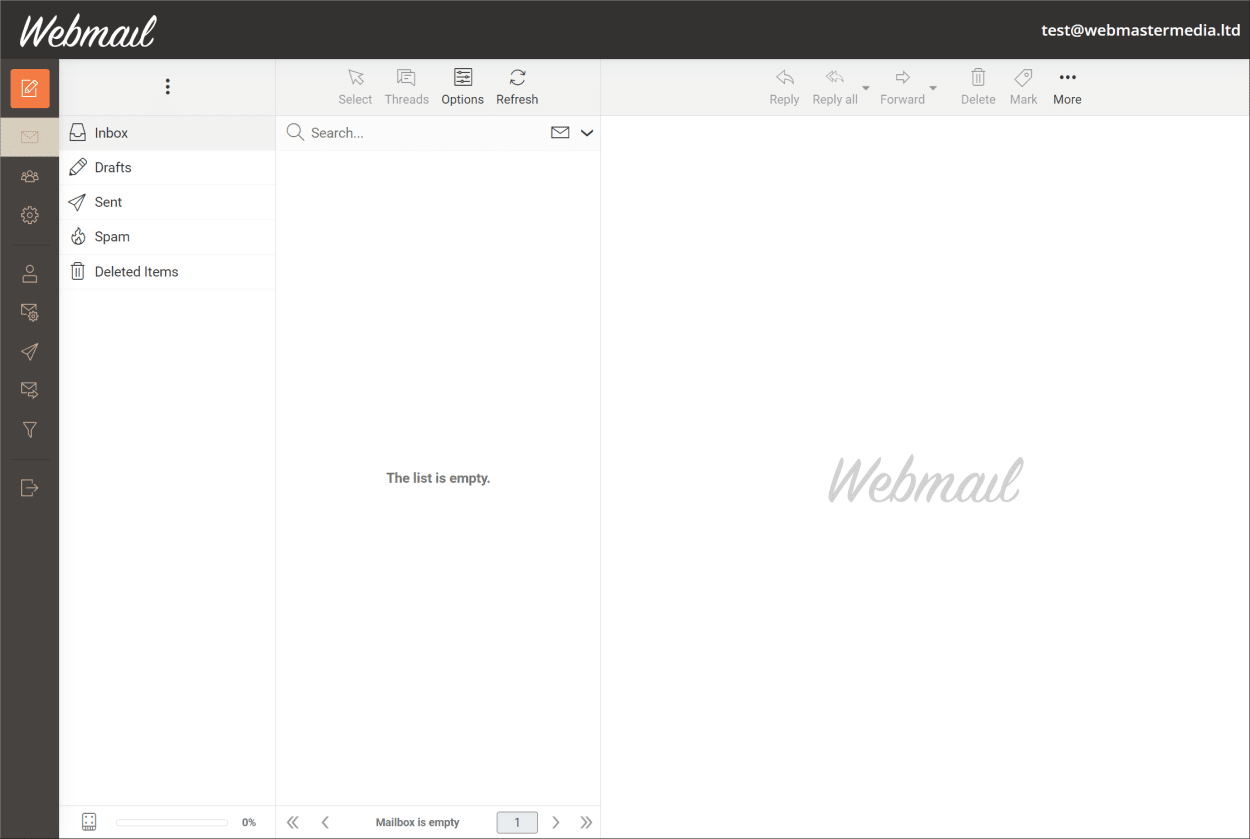
You can use https://webmail.siteground.com/ to access your webmail.
Alternatively, you can set up a redirect from your domain to the webmail URL. For example, from “https://example.com/webmail” to “https://webmail.siteground.com/”.
We’ll talk more about webmail in a later guide.
Email: Forwarders
The Forwarders section is where you can use forwarders to redirect emails from one mailbox to another easily. You can set up discard rules, too.
Forwarders are used to redirect emails from one mailbox to another. This can be useful when you have multiple email addresses and want all emails sent to one central mailbox.
Discard rules are used for preventing emails from reaching a specific inbox or setting up automatic reply messages for unattended email addresses. This can be useful if you want to filter out unwanted emails or automatically respond to emails sent to an address that is no longer in use.
To create a forwarder, enter the email address you wish to forward and the email address you want to forward it to. Then click the “Create” button.

To create a discard rule, go to the “Discard” tab and enter the email address you wish to discard, along with the message you want to send to the sender. Then click the “Create” button.

The default configuration for SiteGround is to automatically discard messages sent to non-existent email addresses, replying to the original sender with the message “No Such User Here”.
You can modify this setting by clicking the button in the “Actions” column next to the relevant email address and clicking “Discard”.

Email: Autoresponders
Autoresponders can be used to notify senders that you’re out of the office, unavailable, or there will be a delay before you can respond.
You can configure the autoresponder to be permanent or to be scheduled for a specific period, as well as set a custom message.
To create an autoresponder in SiteGround Tools, enter the following information:
- Autoresponder email: The email address you wish to create the autoresponder for.
- Autoresponder Sender: The email address you wish to send the autoresponder from.
- Subject: The subject of the autoresponder message.
- Message: The message you wish to send to the sender. You can choose to send it as plain text or HTML.
- Start Date: The date you wish to start the autoresponder.
- Start Time: The time you wish to start the autoresponder.
- End Date: The date you wish to end the autoresponder.
- End Time: The time you wish to end the autoresponder.
- Wait Time: The time you wish to wait before sending multiple messages to the same person.
See the example below:

Email: Spam Filters
The Spam Filters section of SiteGround’s Site Tools allows you to manage your website’s user-level and domain-level spam filters.
These filters provide the flexibility to set up different rules for email processing, both at the domain level, where all emails under that domain are affected, and at the user level.
You can create tailored filters to only apply the action if specific conditions are met. Actions that can be taken include:
- Discard Message: Discard the message.
- Redirect to Email: Redirect the message to another email address.
- Fail with Message: Send a message to the sender, informing them that the message was not delivered.
- Stop Processing Rules: Stop processing rules for this message.
- Pipe to Program: Pipe the message to a program for processing.
To create a spam filter, choose between a domain-level or user-level filter by going to the relevant tab, entering the filter’s information, and clicking the “Create” button.
An example domain-level filter that discards emails with “guest post” in the subject is shown below:

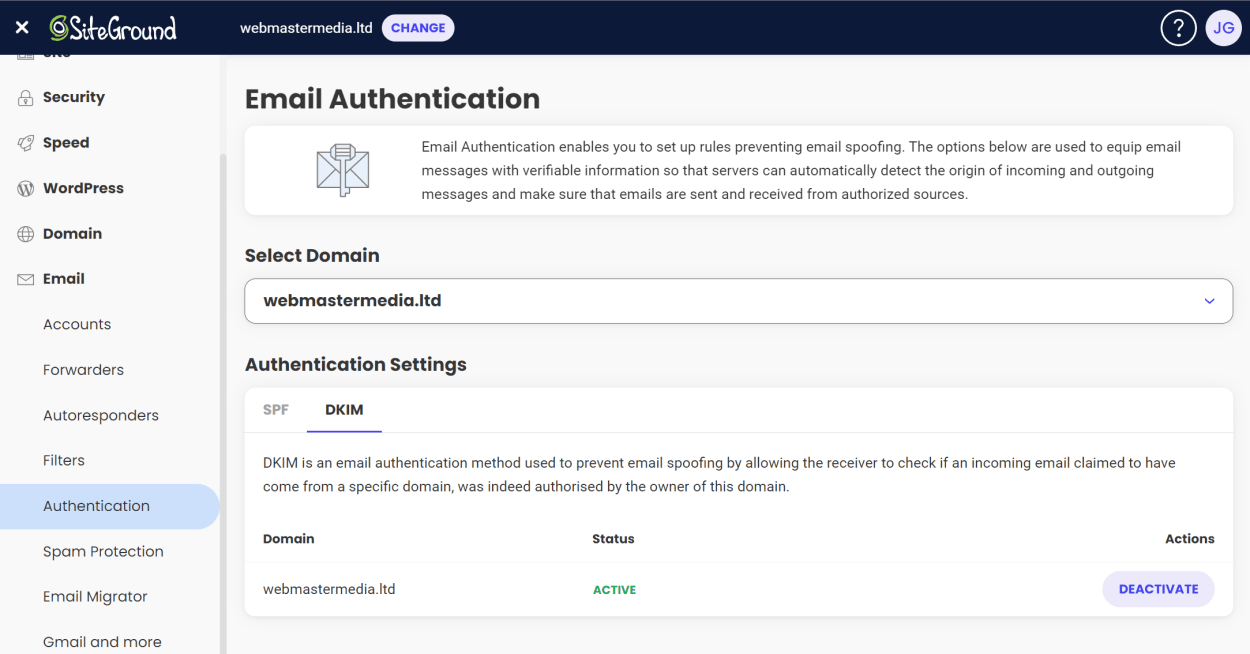
Email: Authentication
The Authentication section of SiteGround’s Site Tools consists of two features; SPF and DKIM.
- SPF (Sender Policy Framework): It is a method of fighting spam by authenticating the sender of an email. An SPF record is added to a domain’s DNS records, which lists the mail servers authorized to send an email on behalf of that domain. When an email is received, the receiving mail server checks the SPF record to ensure that the server that sent the email is authorized to do so.
- DKIM (DomainKeys Identified Mail): It is another method of fighting spam by authenticating the sender of an email. DKIM uses a private key to sign an email, and the receiving mail server uses a corresponding public key to verify the signature. This helps ensure that the email is legitimate and has not been modified in transit.
SPF and DKIM are both enabled by default on SiteGround’s servers. You can view the current status of your SPF and DKIM records by viewing the respective tabs.
The SPF tab shows the current SPF records for your domain, as shown below:

The DKIM tab shows the status of the DKIM status for your domain, as shown below:
We will cover this topic in more detail in a future article.
Email: Spam Protection
SiteGround is currently moving to a new powerful homegrown spam protection system, which will be available to all customers in the near future.
Previously, SiteGround used SolarWinds Spam Experts, which was a well-respected third-party spam protection system.
The new system will provide the following benefits:
- Be easier to use, with a more intuitive interface to allow and block senders.
- Provide better protection against SPAM.
- Is trained by how you use your email and whether you move an email to and from the spam folder. This will allow the system to learn and adapt to your preferences.
We do not yet have access to the new system at the time of writing.
However, from what we have seen, it looks incredibly simple to use. You simply add emails to either an allow list or a block list. That’s it.
Here is SiteGround’s screenshot for adding an email to the allowed list:

And here is their one for the block list:

Email: Email Migrator
The Email Migrator is a brand new feature launched in November 2022 that allows you to migrate your email from another provider to SiteGround.
The tool is straightforward to use. You simply enter the details of your existing email account and the details of your SiteGround email account and click the “Start Migration” button.
You can see this in SiteGround’s own screenshot below:

Your messages will be automatically copied to their server using IMAP. You can then update your domain’s MX record to point your email address to SiteGround’s servers.
The MX record can take up to 72 hours to propagate, so you will need to be patient.
So, what happens to any emails received during this time? SiteGround has thought of this.
SiteGround allows you to do multiple migrations to transfer over any emails received during the propagation period. No duplicates will be created during this process.
SiteGround’s screenshot shows migrations in the past 30 days, and their status is shown below:

As you can see, email migration with SiteGround is about as simple as it gets.
Email: Gmail and more
The Gmail section of SiteGround’s Site Tools is where you can obtain a 20% discount code for a Google Workspace account.
To get the code, click on the “Get Discount Code” button, and you will be taken to a page where you can choose a plan before being given the code, which can be redeemed with Google.
There is no direct integration between SiteGround and Google Workspace.

SiteGround Site Tools: Statistics
The Statistics section of SiteGround’s Site Tools provides basic statistics about your website, such as traffic, error logs, and access logs.
Let’s take a look at each of these in turn.
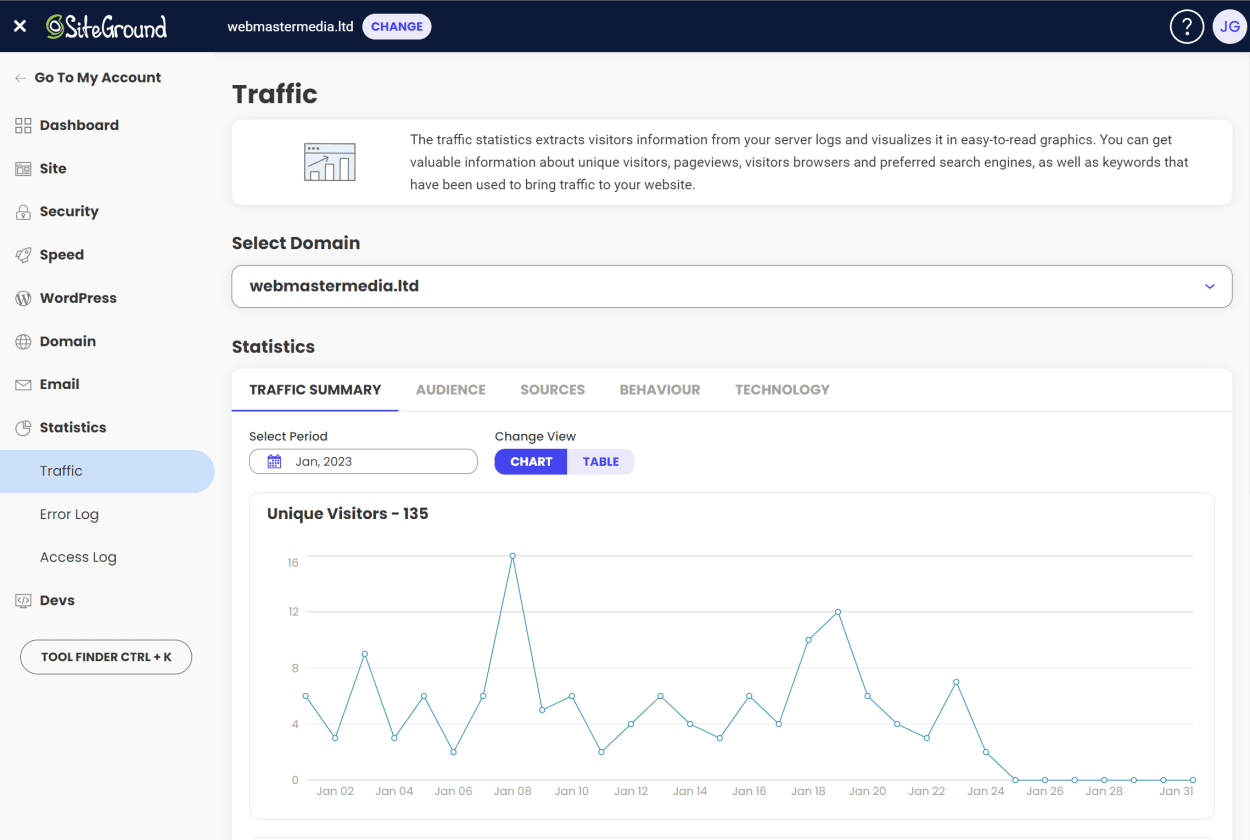
Statistics: Traffic
The Traffic section of SiteGround’s Site Tools is where you can see the following for each month:
- Traffic summary, including the number of unique visitors, page views, pages per visit, and bandwidth used.
- Location of visitors, including the number of visitors from each country.
- Source of visitors, including search engines, referrers, and even a list of keywords used to bring visitors to your website.
- Behavior, including the most popular pages, file types, and status codes.
- Technology, including the most popular browsers and operating systems
Below is a screenshot of the Traffic summary tab:
Statistics: Error Log
The Error Log section of SiteGround’s Site Tools is where you can manage your website’s error log.
SiteGround states, “Reviewing the error log can be useful for troubleshooting broken links, files, and other errors”. However, on testing this, it appears that the error log is only populated when malicious activity is detected.
Below is a screenshot of the Error Log tab showing malicious activity being blocked by SiteGround’s firewall:

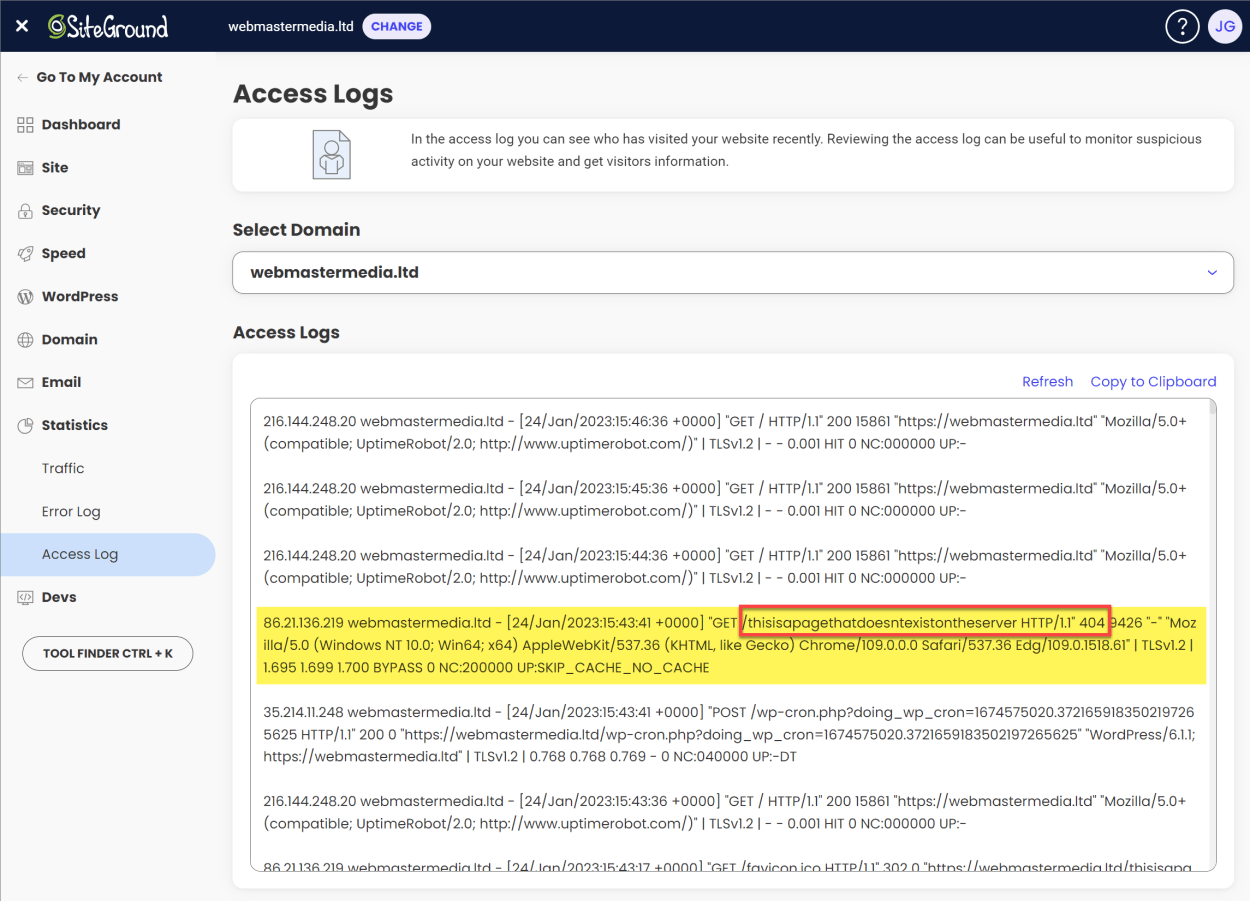
Statistics: Access Log
The Access Log section of SiteGround’s Site Tools lets you view who has recently accessed your website.
By reviewing this log, you can easily:
- Identify broken links
- Resolve missing files
In the following example, we visited our own website for an URL that didn’t exist, with it showing the 404 status code:
That said, we tested it with broken image files, and they didn’t appear in the access log. So it’s not a perfect solution.
It’s probably more valuable as a tool to identify malicious traffic. For example, if you see a lot of traffic from a particular IP address, you can block it.
SiteGround Site Tools: Devs
The Devs section of SiteGround’s Site Tools is where you can manage an array of more technical aspects of your website, including:
- Installing Git
- Managing Cron Jobs
- Managing PHP versions
- Managing SSH Keys
- Installing Apps (WordPress, Joomla, Drupal, Magento, PrestaShop, and OpenCart, etc.)
Let’s take a look at each of these in turn.
Devs: Git
The Git section of SiteGround’s Site Tools is where you can install or destroy the Git repository for your website.
To create a Git repository, select the website installation and click on the “Create” button.

Once you have created the Git repository, you can clone it to your local machine. The Git clone command can be found in the Actions button under the “Manage Repositories” section.
You must set up your SSH keys before you can clone the repository. We’ll cover the SSH Keys Manager later in this article.
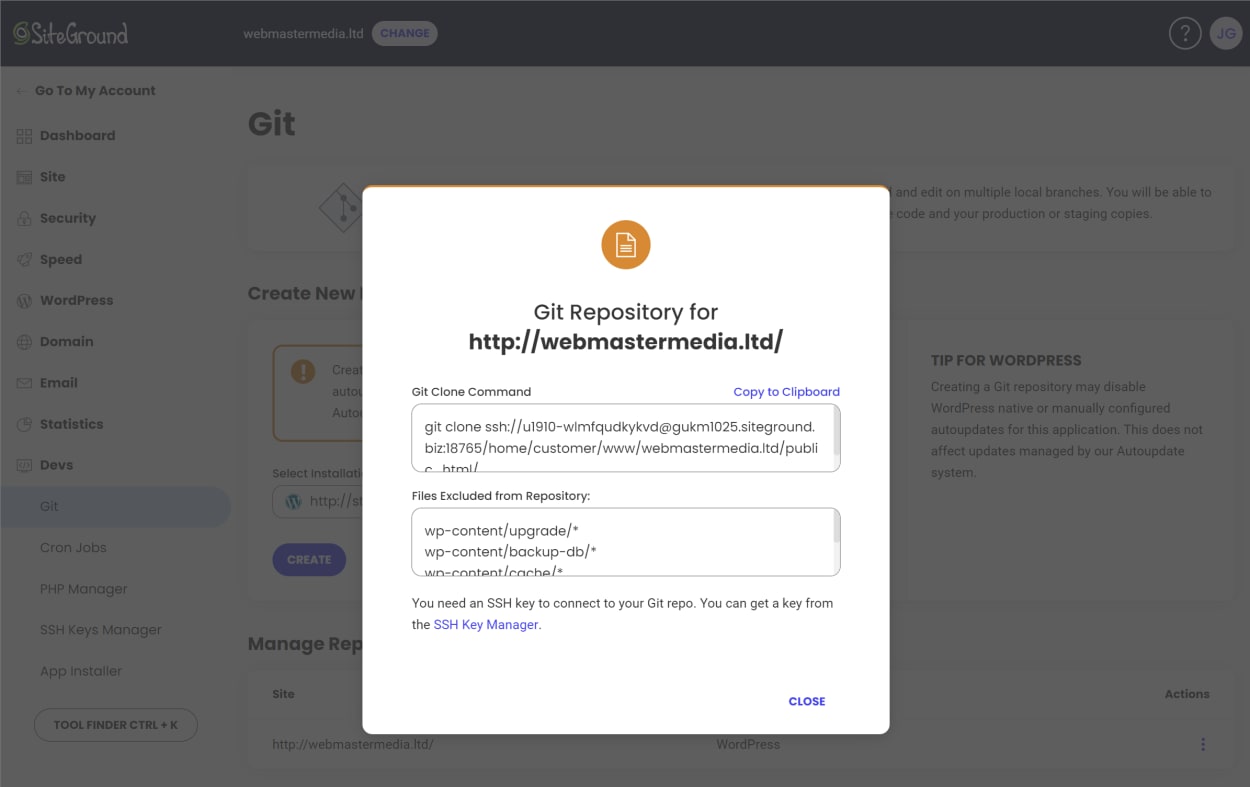
It’s worth noting that creating a Git repository may disable manually configured auto-updates for WordPress, although SiteGround’s auto-update system is not affected.
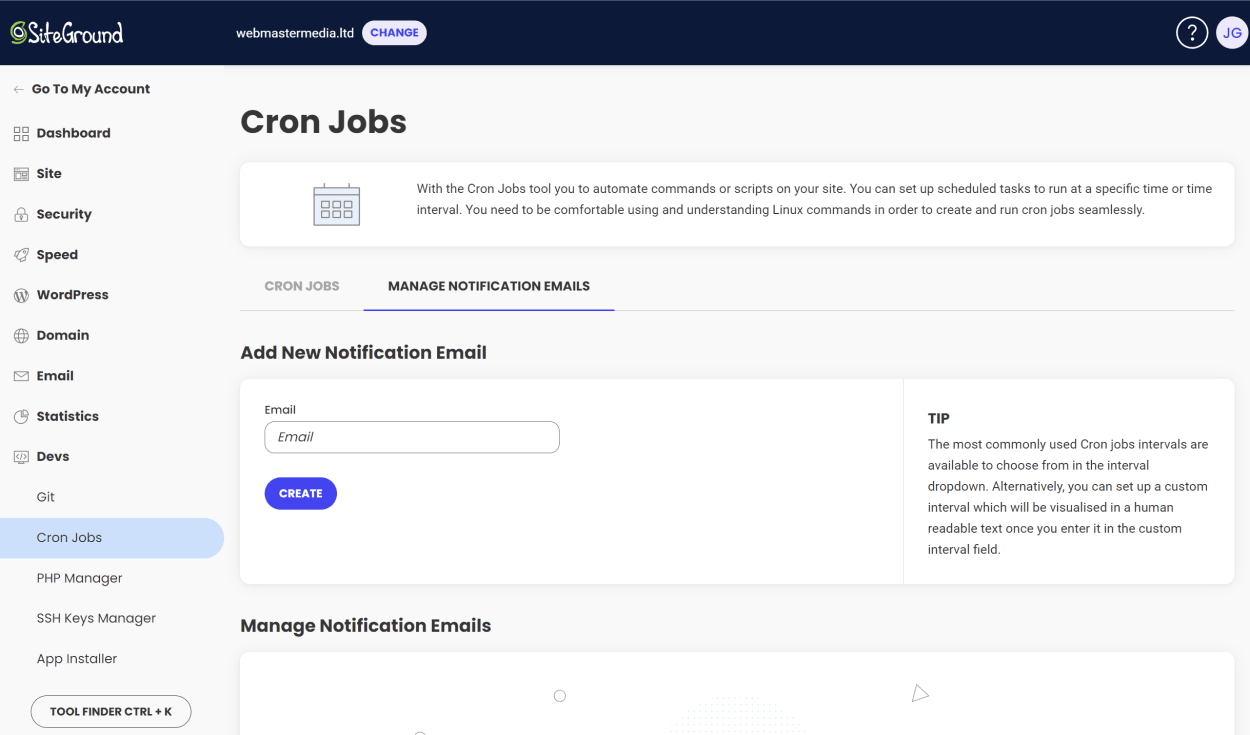
Devs: Cron Jobs
The Cron Jobs section of SiteGround’s Site Tools is where you can manage your website’s cron jobs.
To create a cron job, add the following information:
- Command: The command to run
- Interval: Preselect from a list of common intervals, or enter a custom interval
- Custom interval: If you selected “Custom” in the previous field, enter the custom interval here
Then click on the “Create” button.

You can add an email address in the “Manage Notifications Emails” tab to receive an email when the cron job runs (or fails to run).
Devs: PHP Manager
The PHP Manager section of SiteGround’s Site Tools is where you can manage your PHP version for your website, including:
- Switching between PHP versions
- Configuring PHP Variables (Not available on Ultrafast PHP)
- Configuring PHP Extensions (Not available on Ultrafast PHP)
PHP Versions
SiteGround is well known for making the latest versions of PHP available before other web hosting providers. However, these new versions may break specific plugins or themes on your website. To avoid this, SiteGround allows you to switch between PHP versions on a per-domain basis.
Here are some of the key points to note about PHP versions:
- If you are not on the Starter Plan, you have the option to select an Ultra Fast version of PHP, optimized for WordPress, which is up to 30% faster than the standard PHP version.
- SiteGround also offers a managed PHP service, which automatically updates your PHP version to the latest stable version.
- If you want to be on the latest version of PHP, or a previous stable version for compatibility purposes, you can manually change your PHP version but you will not get any automatic updates.
- If you have a Staging site, you can also change the PHP version for that site. However, Staging sites use the standard PHP setup, not Ultrafast PHP.
By default, SiteGround will be configured to Ultrafast PHP (if you are on a plan that supports it) and the managed PHP service.

If you want to move to the latest PHP version, click the pen button in the “Actions” column next to your current PHP Version, and select your preferred version. The popup will ask you to choose between “Managed PHP” and “Change PHP version manually”. After choosing the latter, you can select your PHP version.

PHP Variables
SiteGround allows you to configure PHP variables for your website. This is not available on Ultrafast PHP.

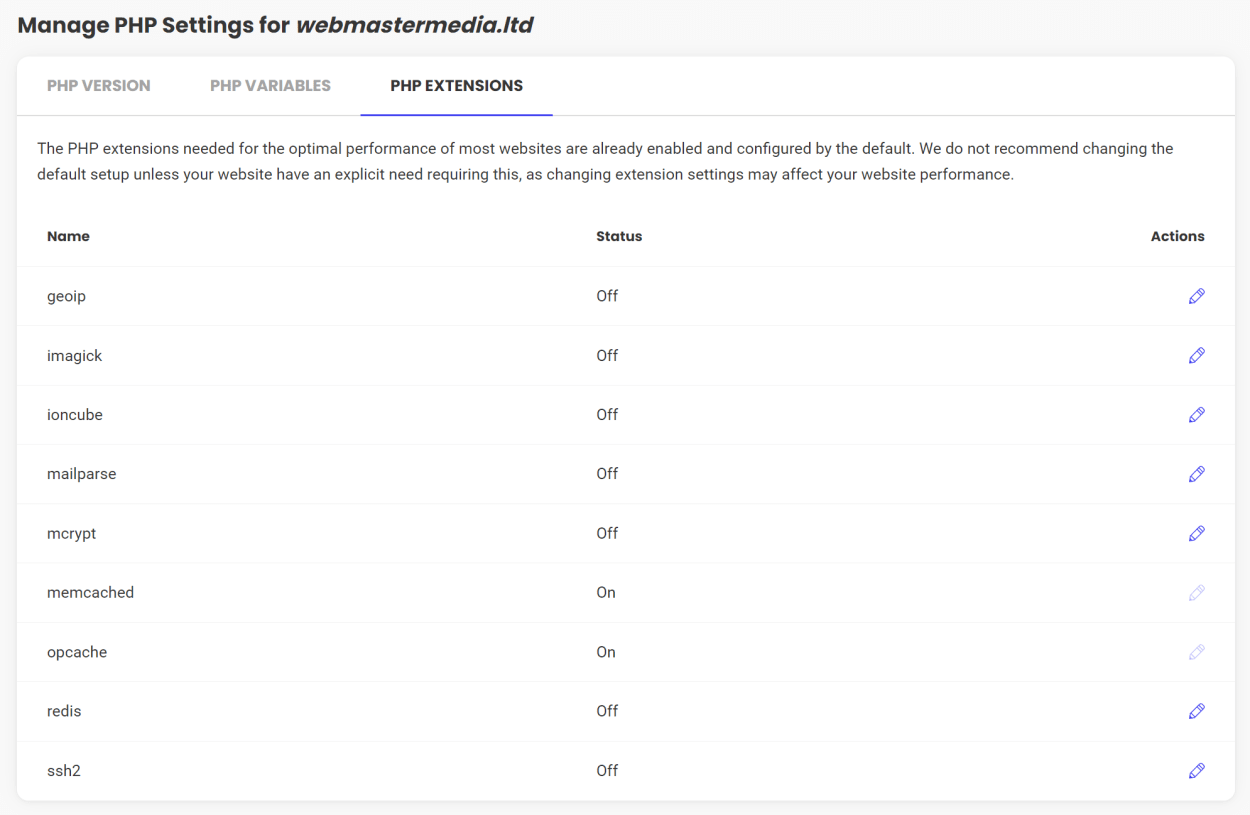
PHP Extensions
SiteGround allows you to configure PHP extensions for your website. This is not available on Ultrafast PHP.
Devs: SSH Keys Manager
The SSH Keys Manager section of SiteGround’s Site Tools is where you can create, import, and manage your SSH Keys.
Let’s look at each of these options in more detail.
Creating SSH Keys
To create an SSH key, enter the name of the key, add a password, and click on the “Create” button. Before pressing the “Create” button, you can note down the SSH credentials displayed to the screen’s right.

Once you have created your SSH key, you will be invited to Manage IP Access for that key to secure access to your server.
Importing SSH Keys
To import an SSH key, click on the “Import SSH Key” button.

Managing SSH Keys
To manage your SSH keys, click on the “3 dots” button next to the SSH key you want to manage. You can then choose to:
- View your SSH Credentials
- Manage IP Access
- View your Private Key
- View your Public Key
- Change the name of your SSH Key
- Delete your SSH Key

We’ll cover this in more detail in a future article.
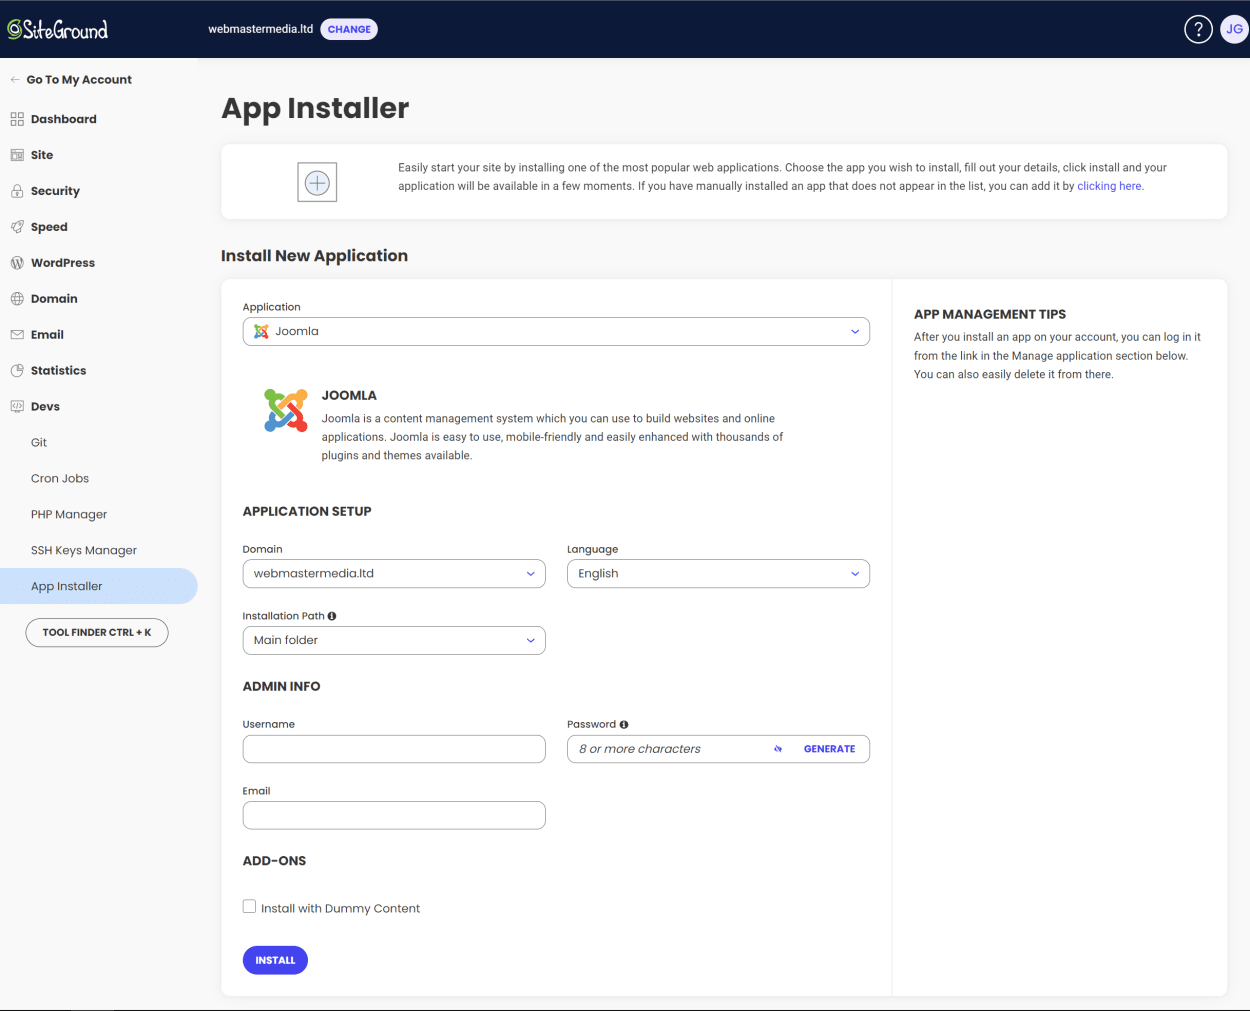
App Installer
The App Installer section of SiteGround’s Site Tools is where you can install the apps shown in the table below:
| Blogs / CMS | Shopping Carts | Forums | Wiki & Education | Helpdesk | CRM | Other |
|---|---|---|---|---|---|---|
| WordPress | WordPress + WooCommerce | phpBB | MediaWiki | osTicket | vtiger | LimeSurvey |
| Joomla | PrestaShop | Moodle | ||||
| Drupal | OpenCart | |||||
| Weebly |
For example, installing Joomla is as simple as selecting the domain, language, installation path, and login credentials. You can also choose to install a sample data set. See the screenshot below:
For a detailed guide on how to install WordPress, see our article on How to Install WordPress on SiteGround.
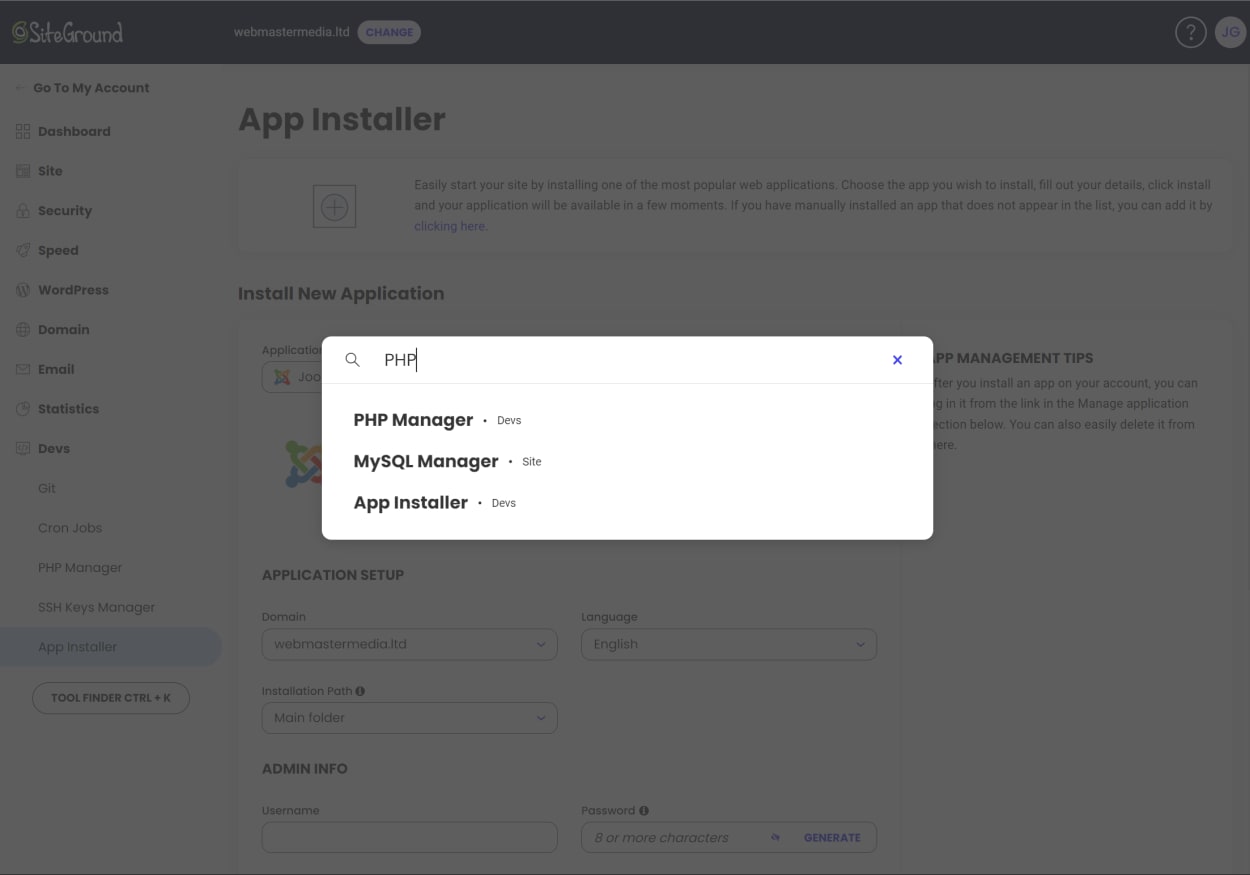
Tool Finder
You will find the Tool Finder at the bottom of the Site Tools page sidebar. This search tool allows you to search for a specific tool.
For example, if you want to search for the “PHP Manager”, you can type “PHP” into the search box and click on the “Search” button.